Easily integrate the Size Chart application and improve your customers' user experience
Integrating the Size Chart app is an automated process that allows you to seamlessly activate the option on your online shop that offers products in different sizes.
How to create the Size Chart
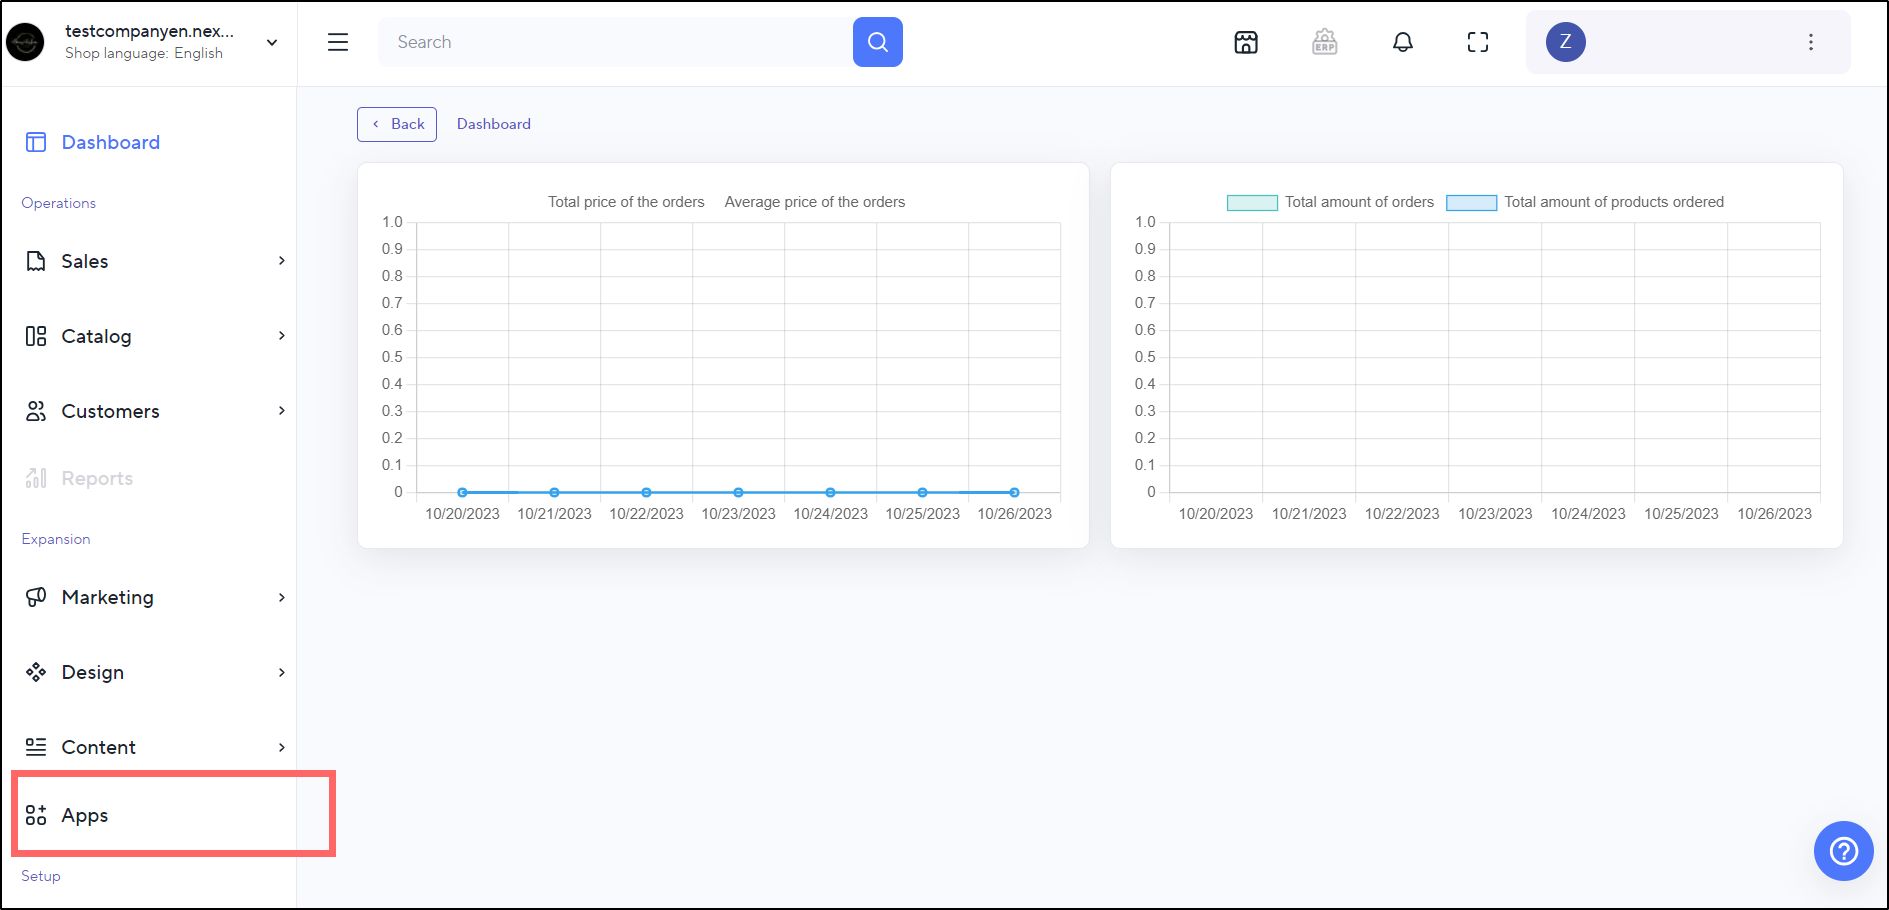
1. Open your store's Admin panel.
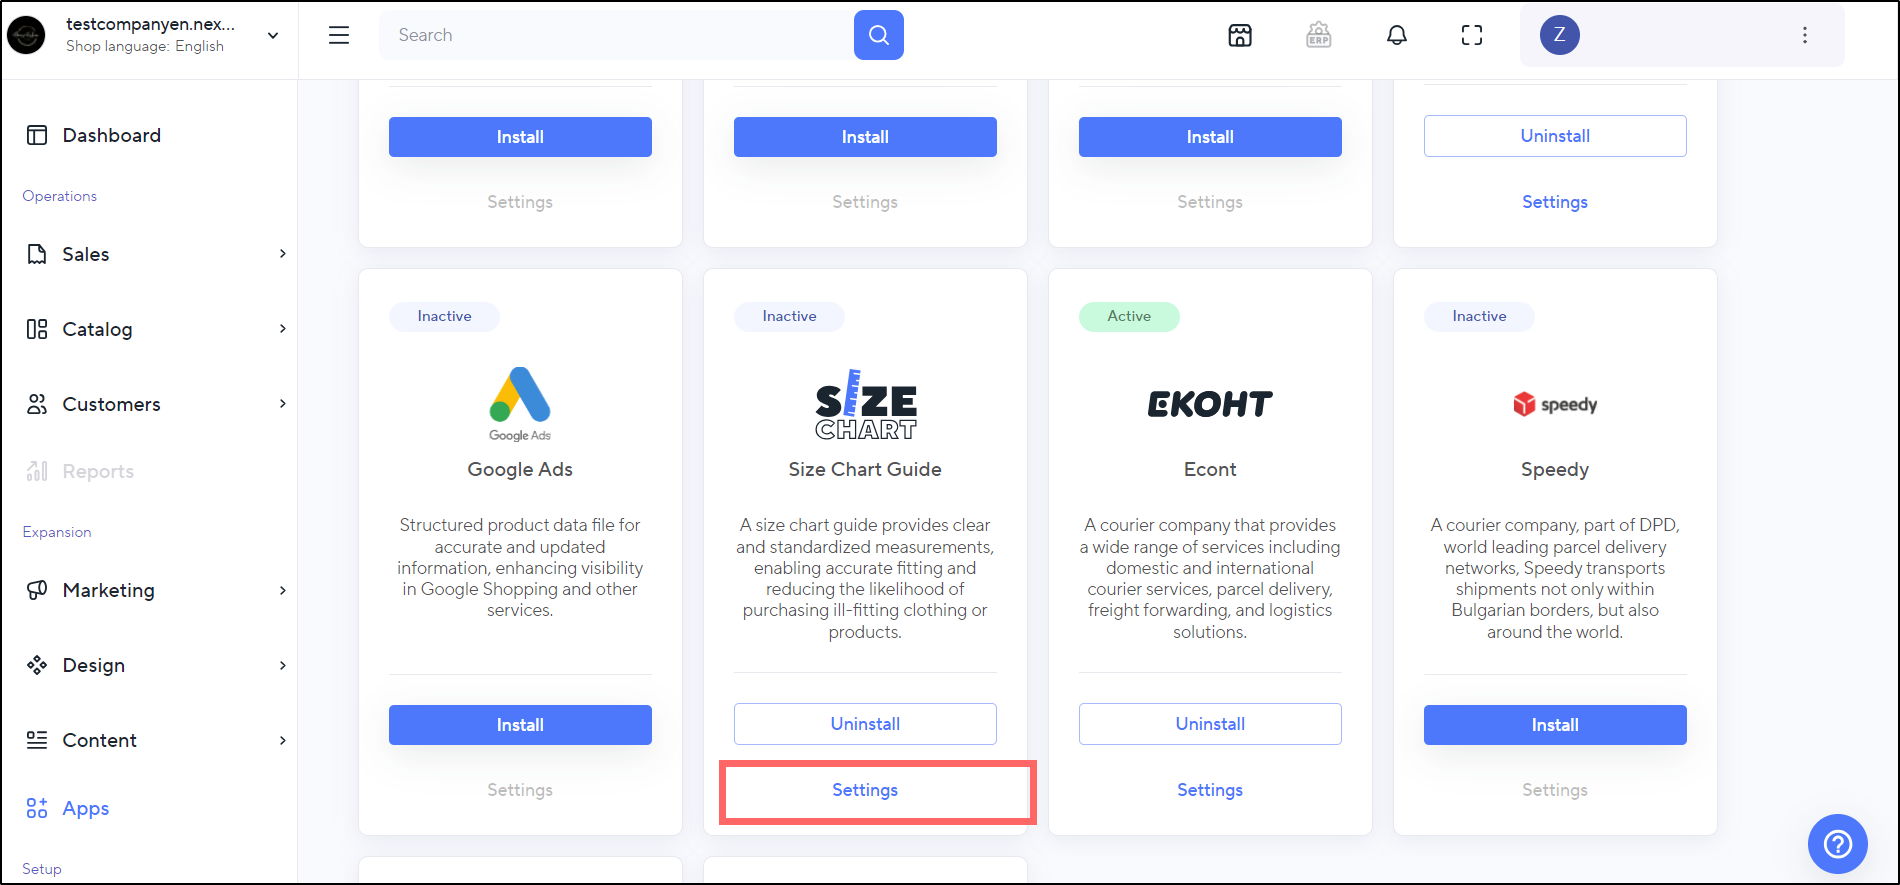
2. In the main menu on the left, go to Apps.
3. Under the Manage your Apps section, find Size Chart and hit Install.
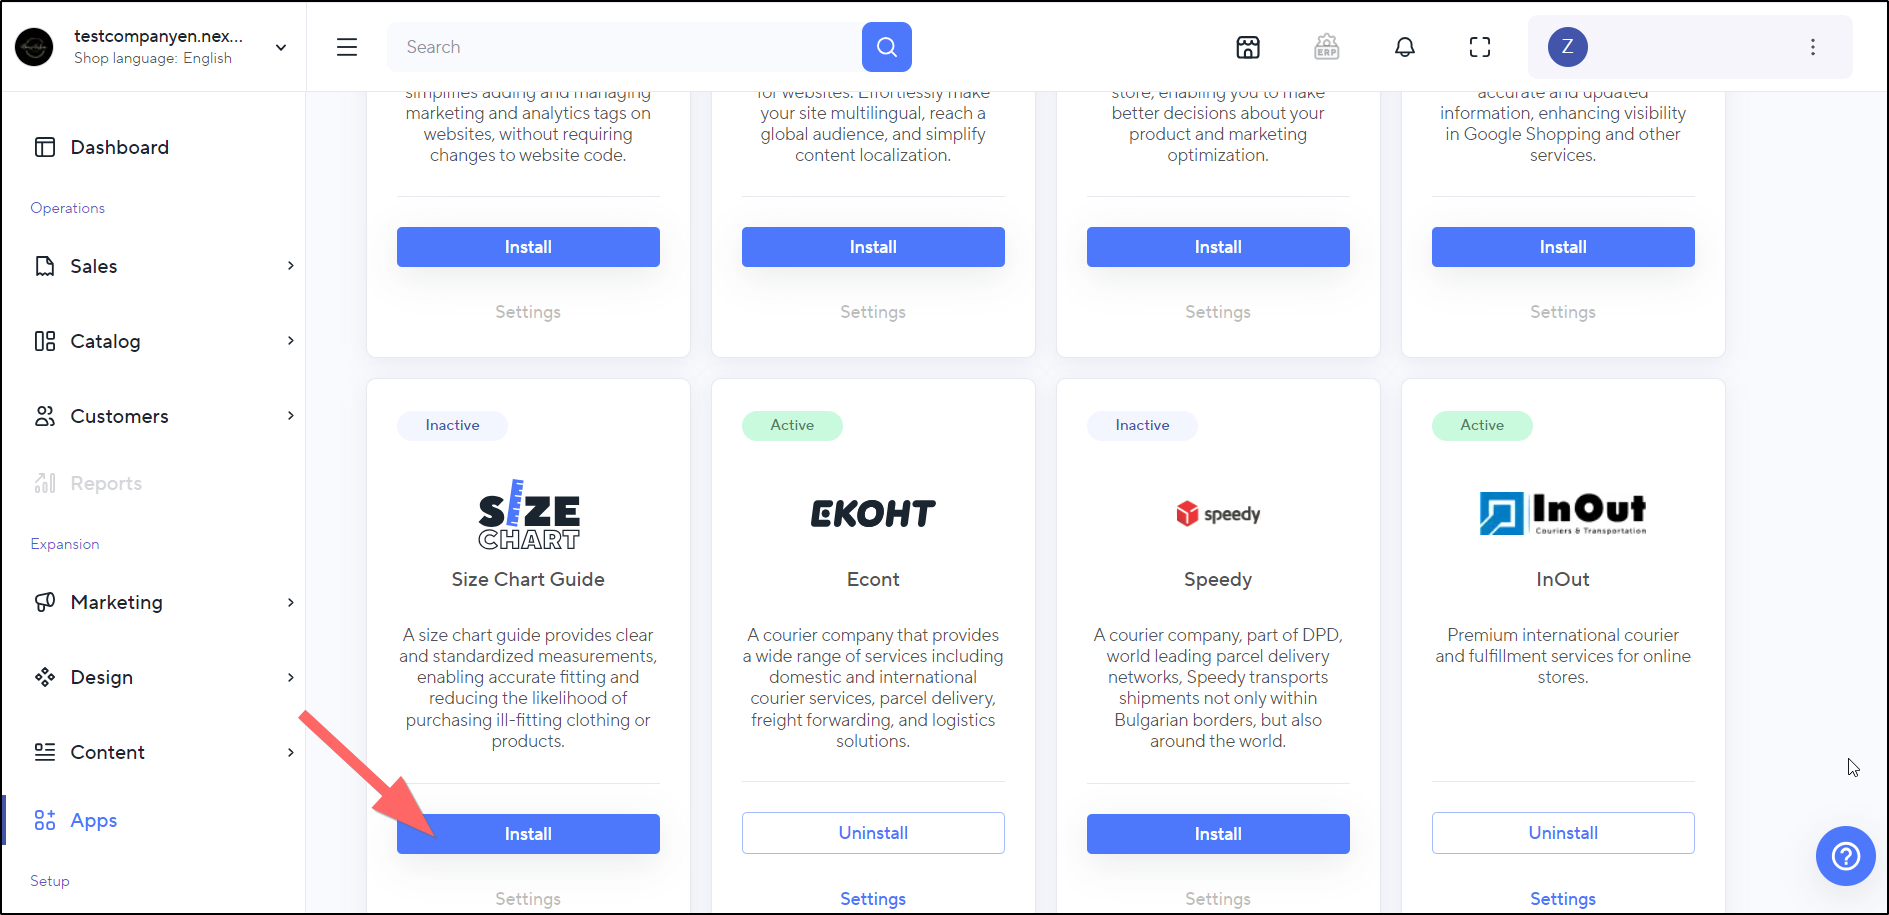
4. Hit Settings.
5. Hit the Create size chart button.

6. In the designated field, enter a name of your size chart, that will appear on the storefront.
7. Upload an image for the size chart (example: if want to show different clothes measures, upload an image/graph that shows precisely that).
8. Set the status to Active via the toggle-switch button.
9. Hit Save to confirm your settings.

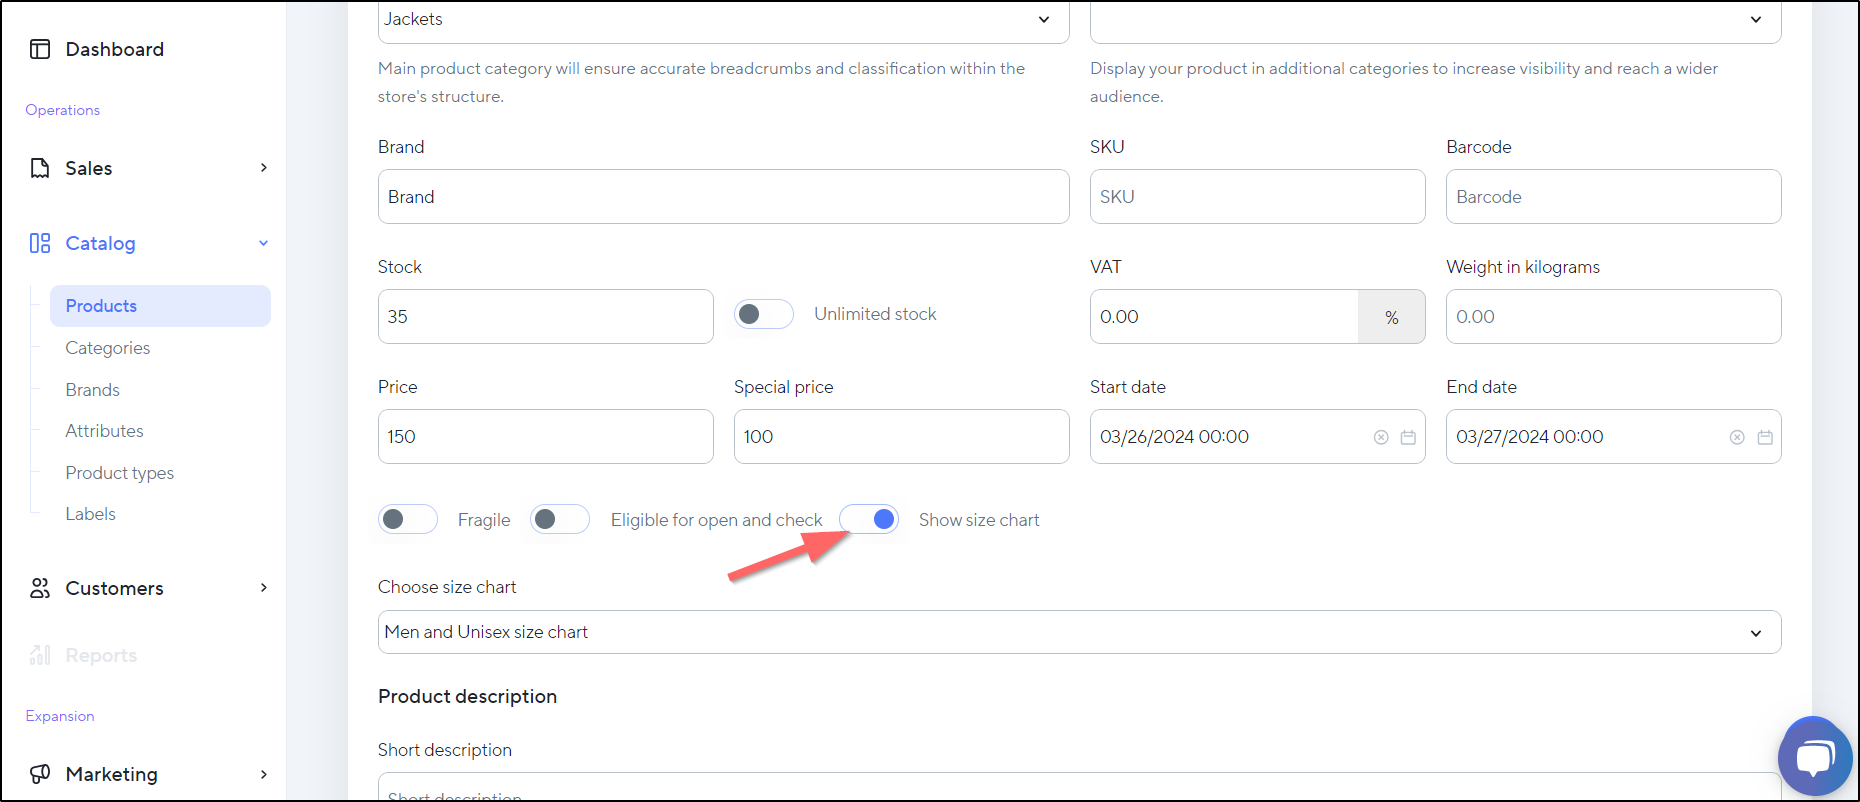
Keep in mind - the Size Chart must be associated with a specific main product to be visible to it and its variants.
Activating the Size Chart for a specific product
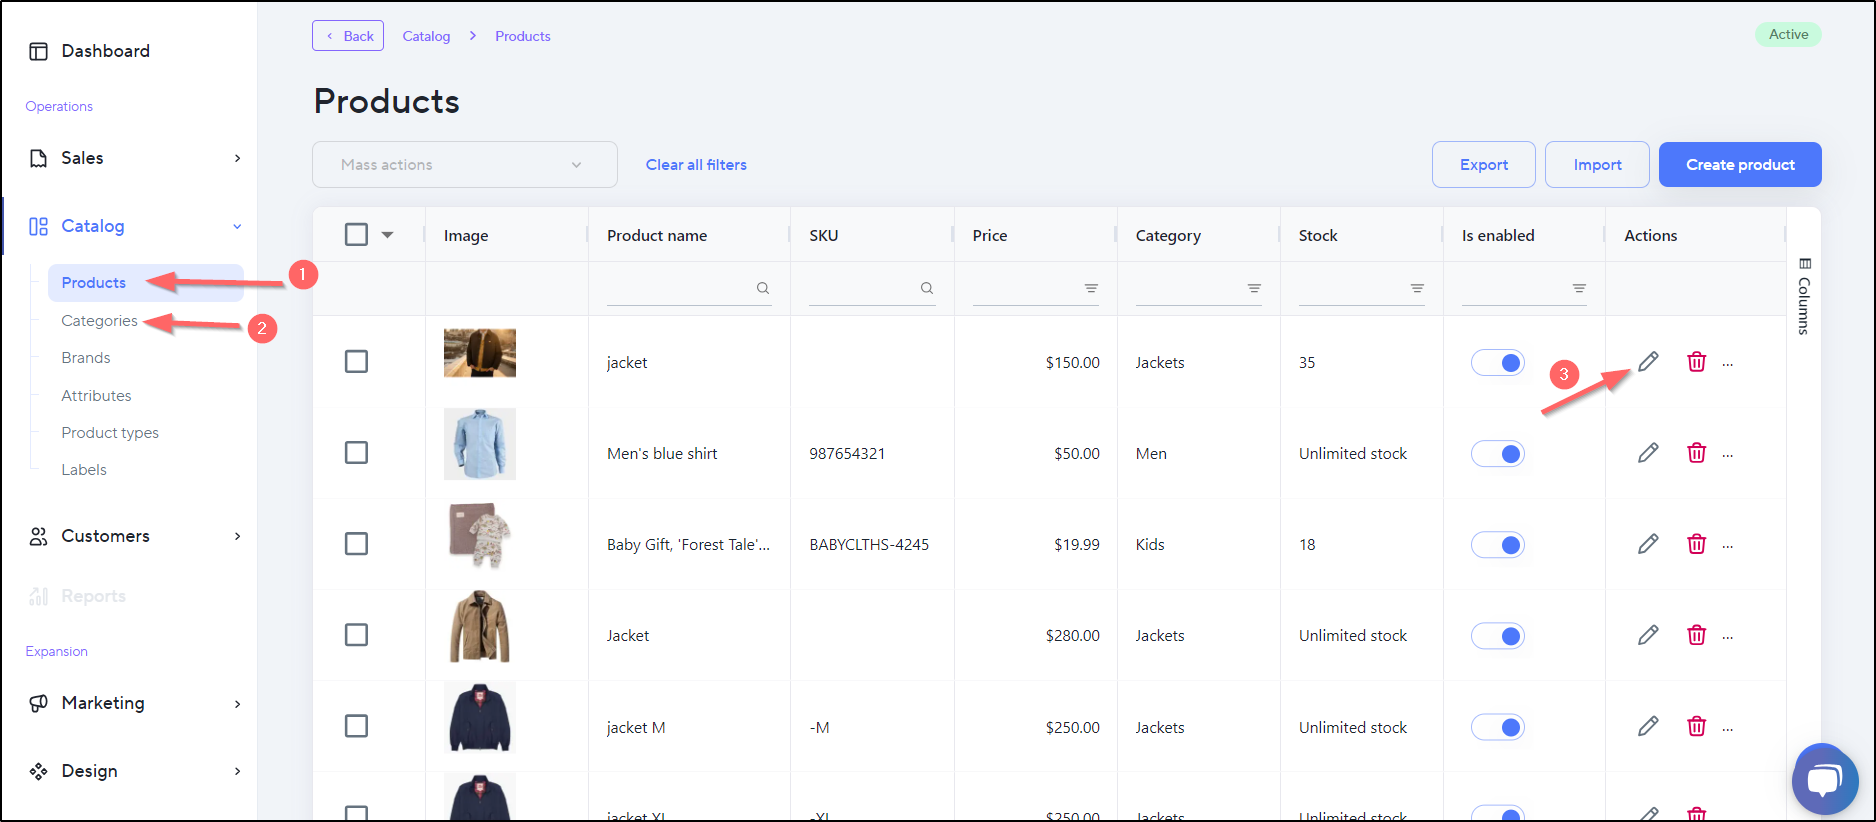
- In the store's admin panel, go to Catalog > Products.
- Select the edit icon for the specific main product you want to attach the size chart to.

- Under Product values, find and activate the Show size chart toggle button.

- Confirm with the Save button in the upper right corner.