This step-by-step process ensures a smooth and efficient experience for third parties looking to set up and activate a Paystack account to receive payments on NEXT BASKET
Creating a Paystack account
- Setting up a Paystack account from the beginning https://dashboard.paystack.co/#/signup
Enter details such as business name, email address, country, and the creation of a password.

- Starter Business (not registered with CAC)
- Registered Business (registered with CAC)
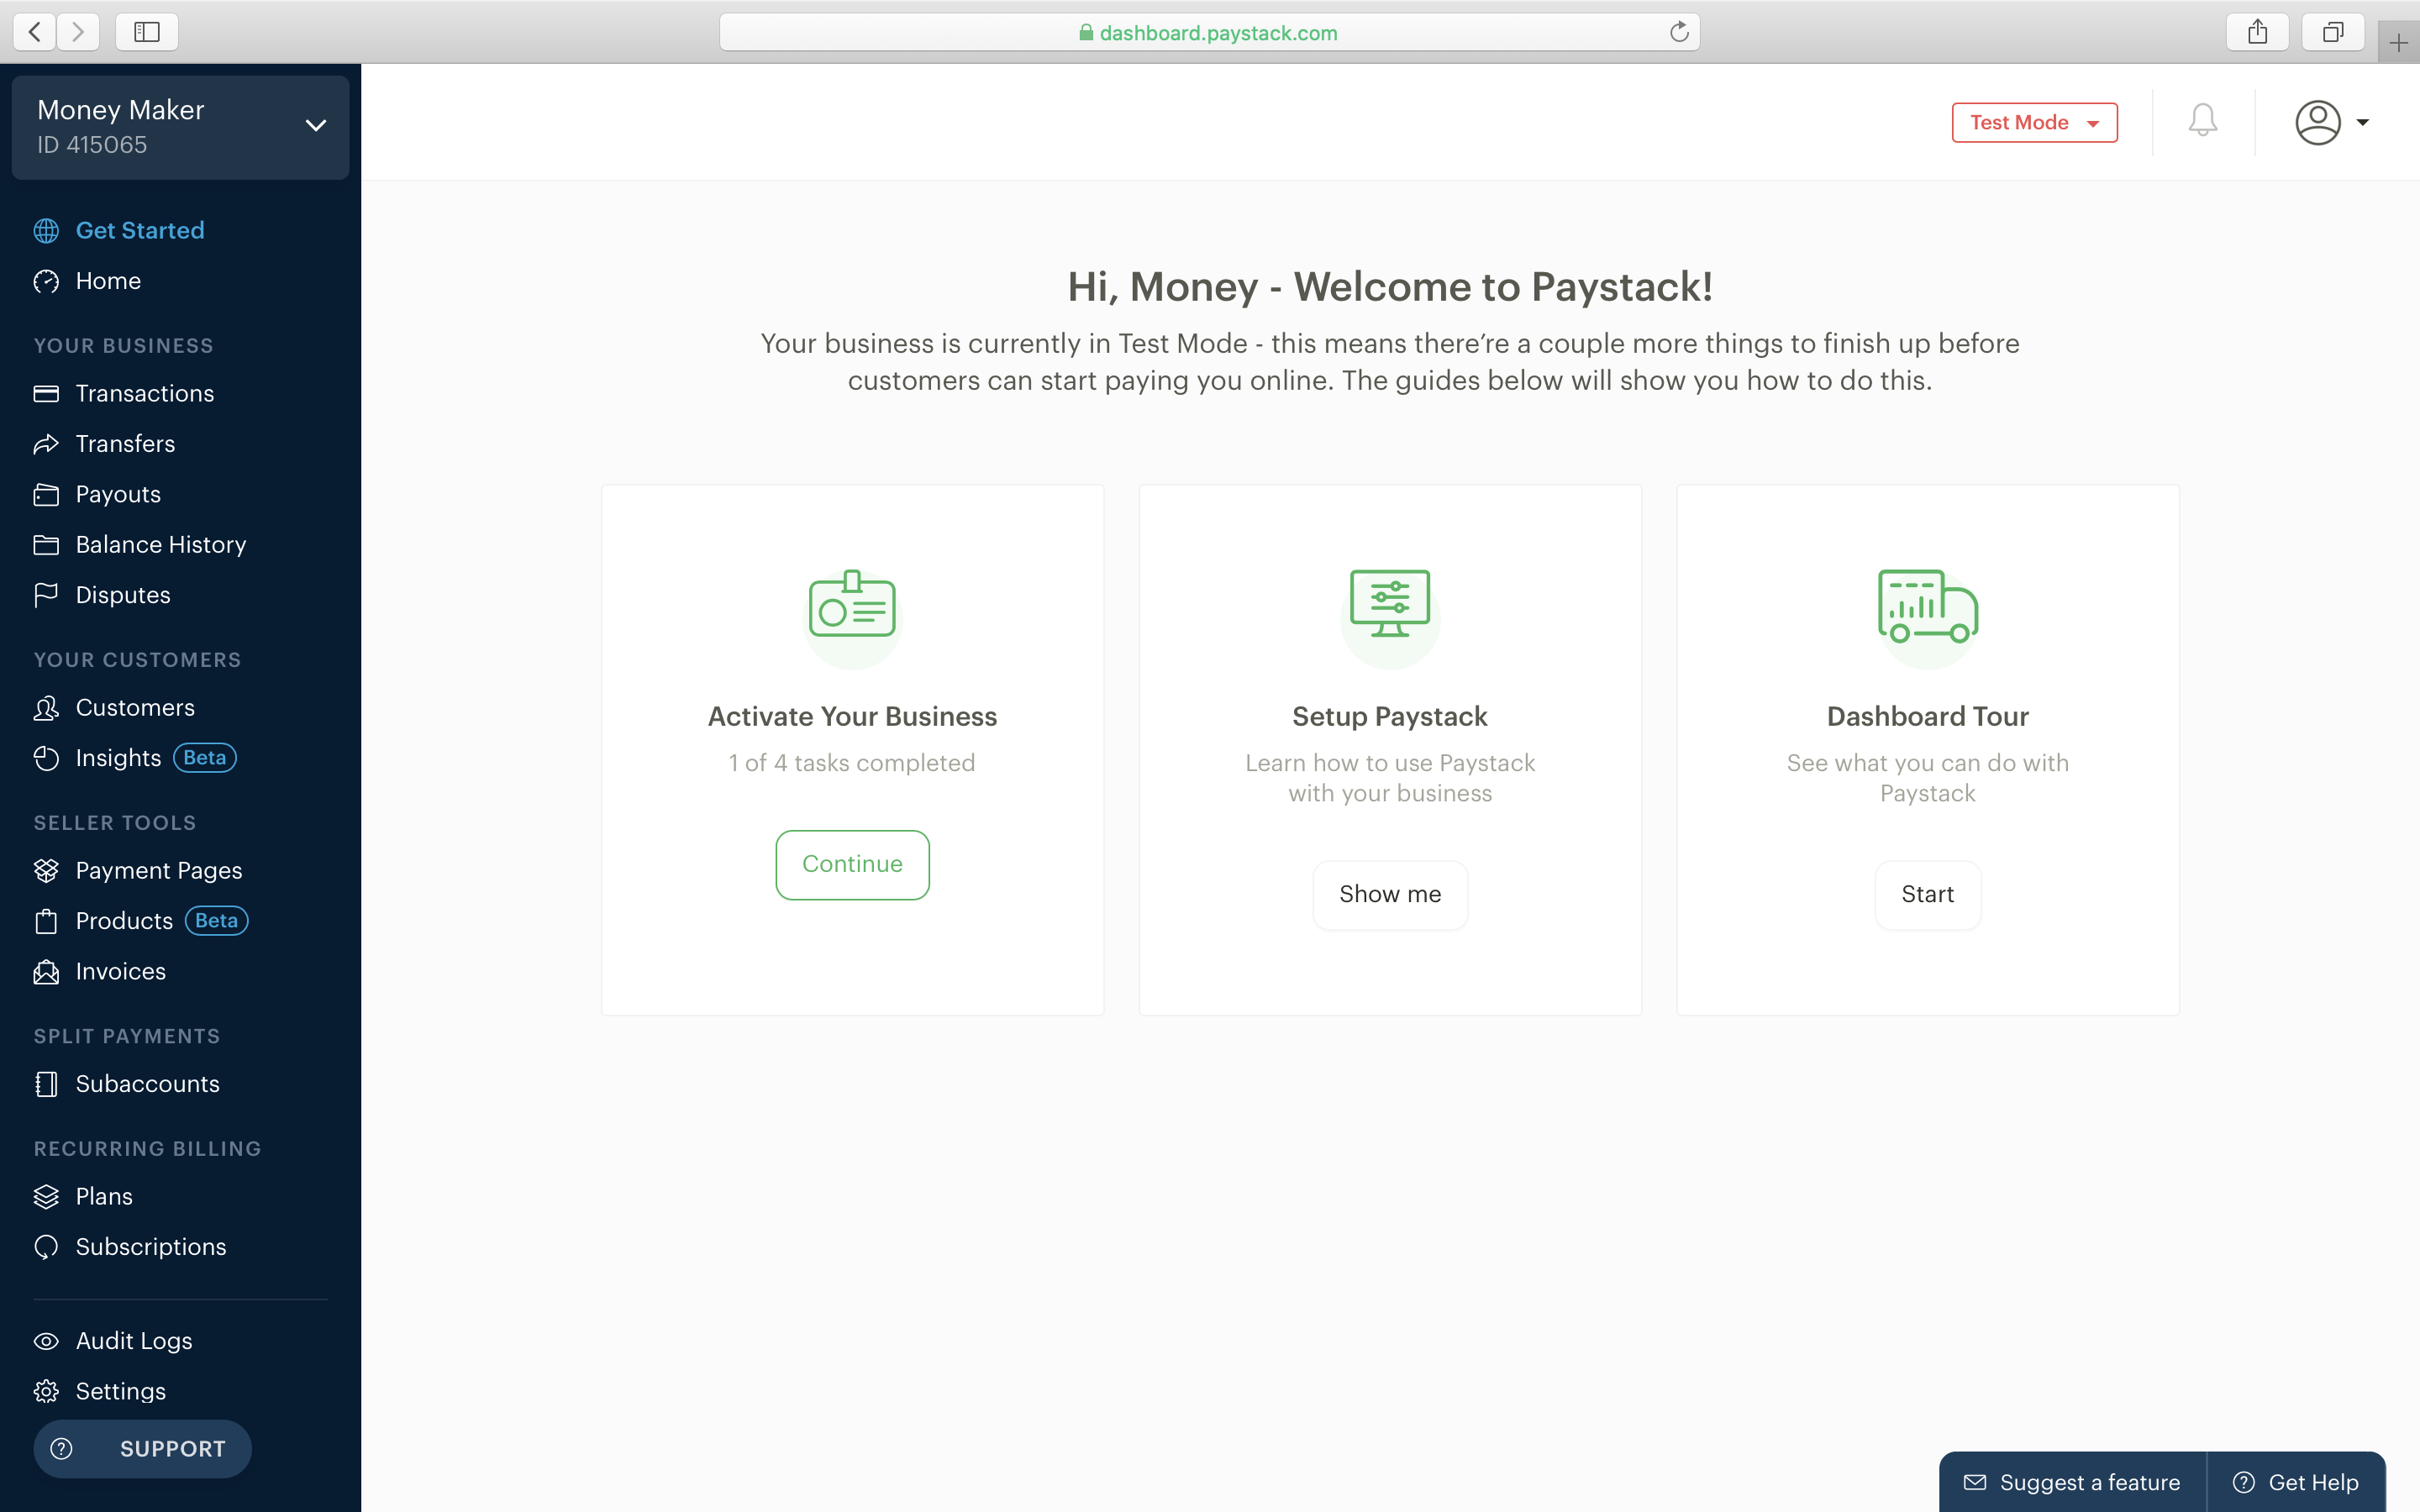
3. After the setup is finalized, you will be redirected to your dashboard, indicating the successful creation of your Paystack account.
However, it’s important to note that the account initially operates in Test Mode, limiting it to test transactions only.
Transition to Live mode and enable real-money transactions to activate your Business.
How to activate your Paystack starter business
All Paystack businesses start in Test Mode so you can fully understand the Paystack payment flow before activating your business. In Test Mode, you can integrate with Paystack, use the Dashboard, and make test payments. To start accepting real money, you need to activate your business by submitting all Compliance forms on the Dashboard.
The Compliance page has four main sections that you will notice:
Profile
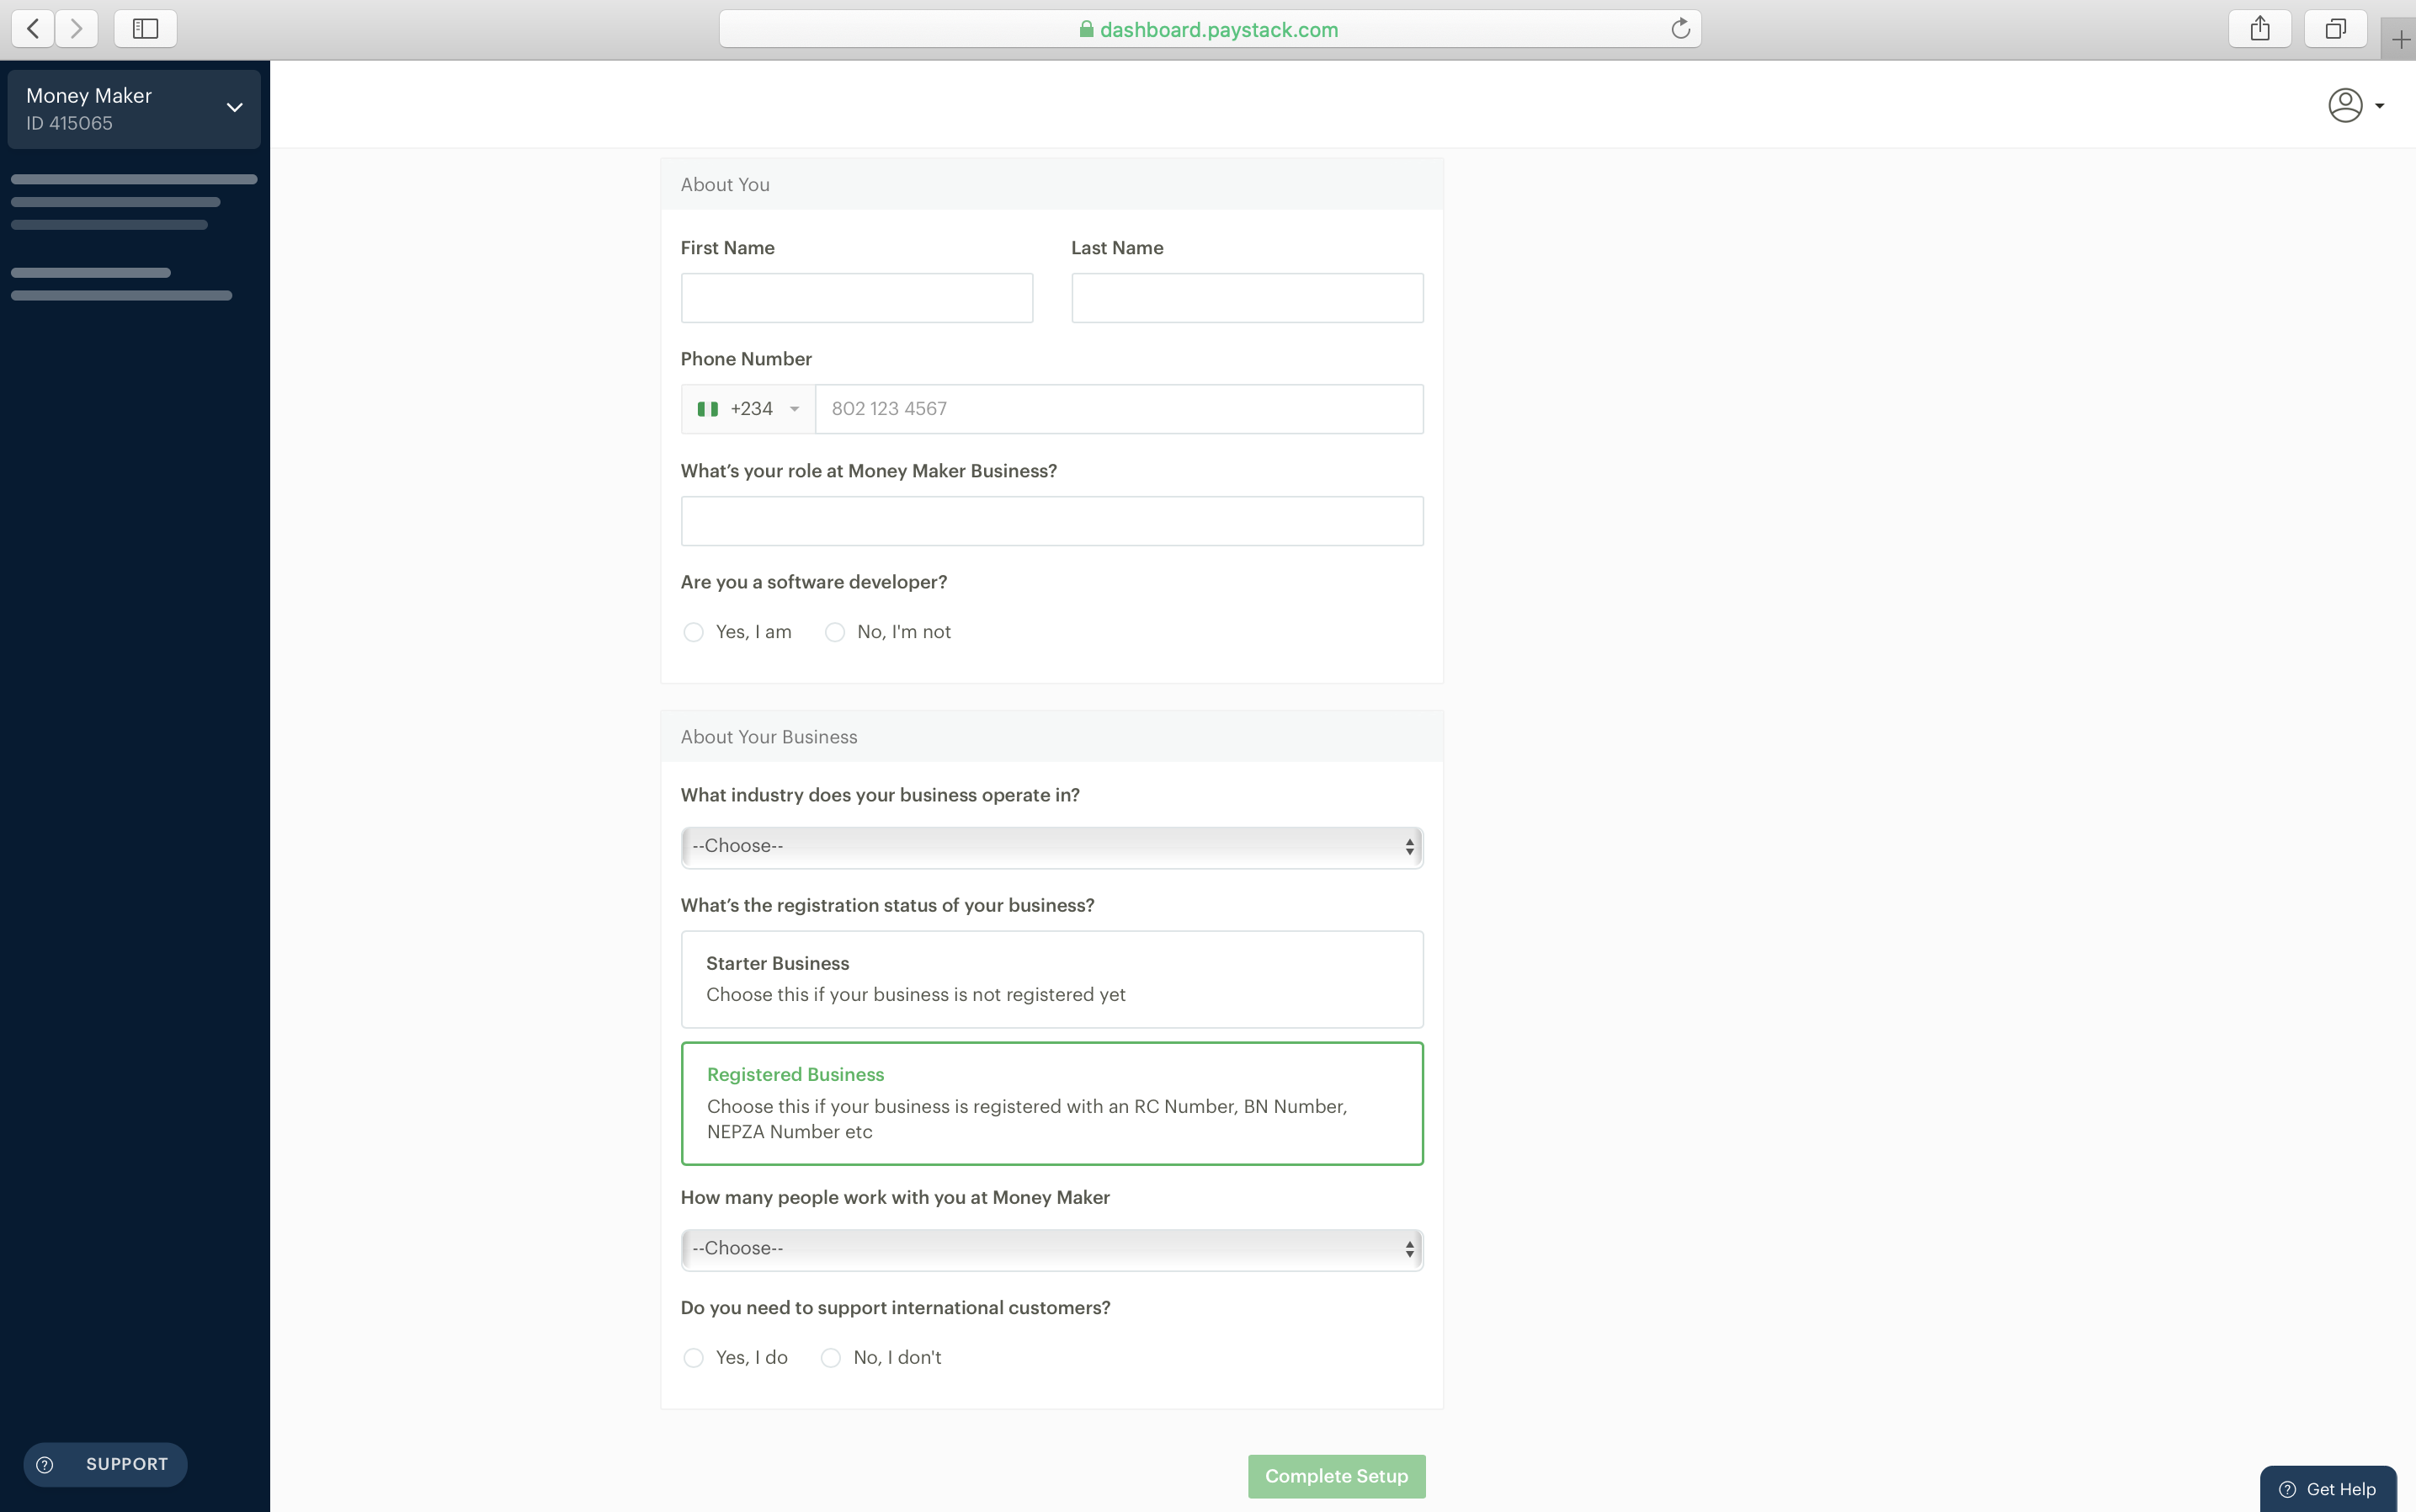
On the Profile page, describe and categorize your business.
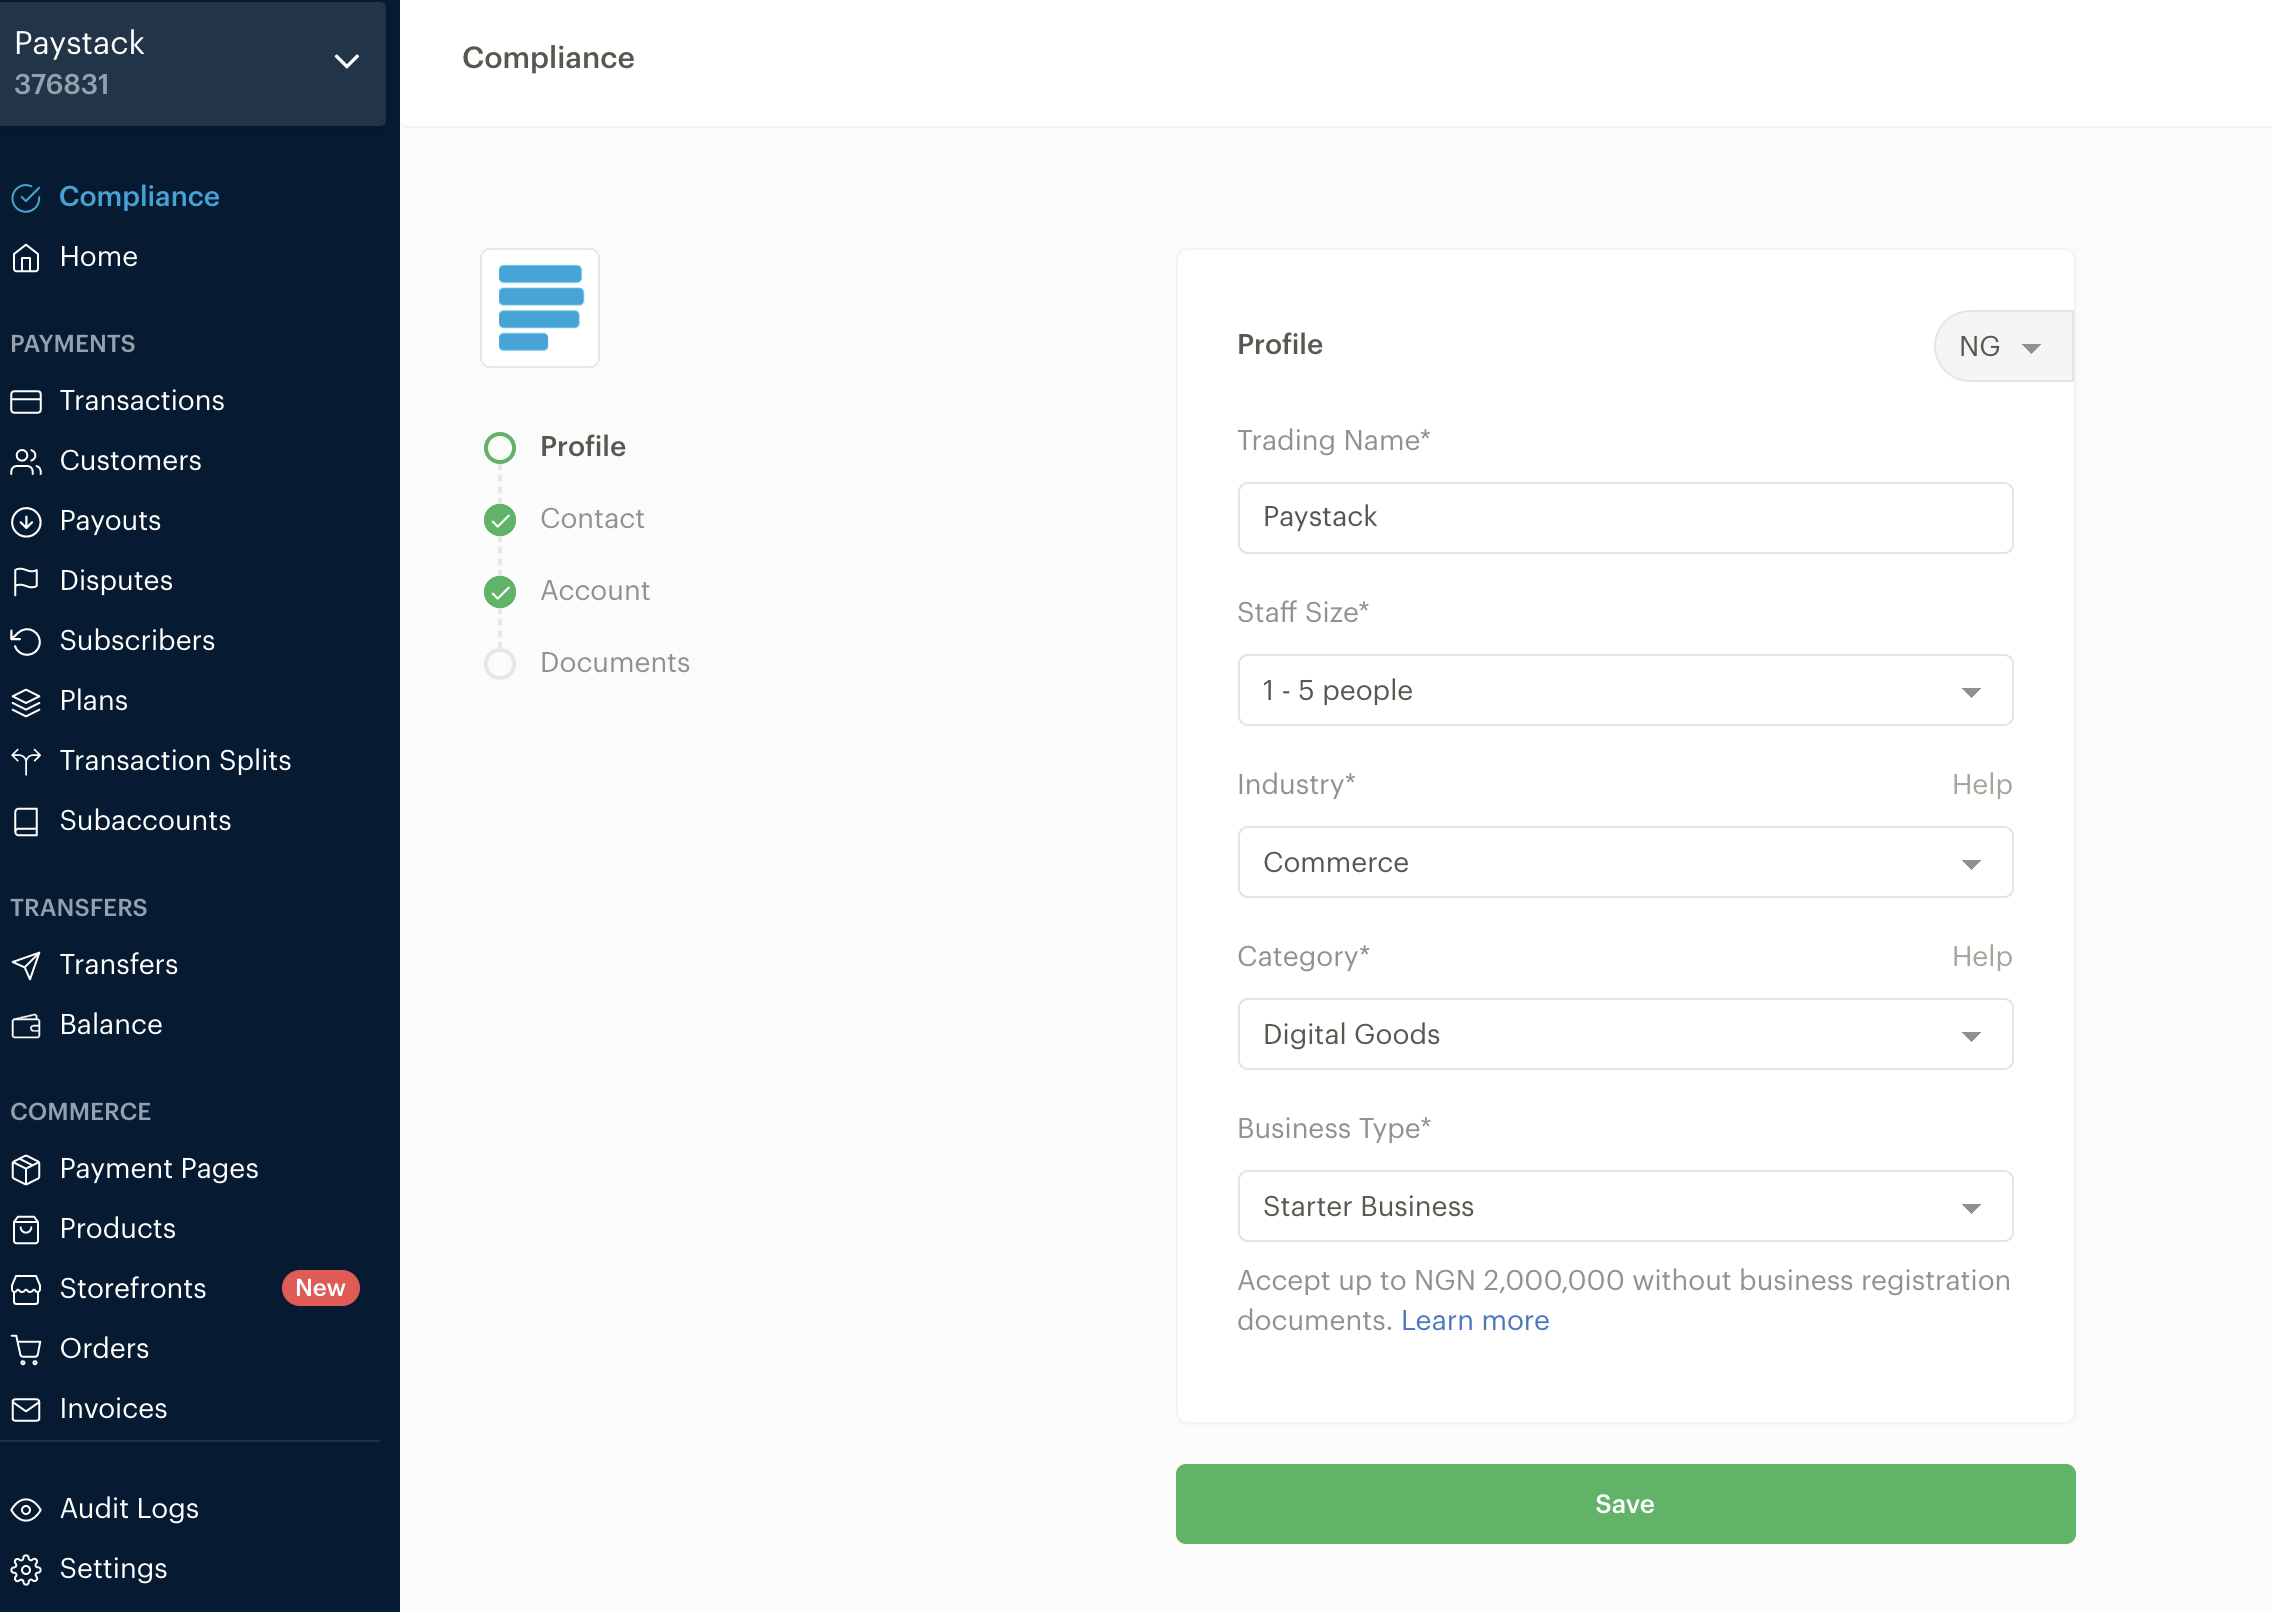
- Trading name: This is your company’s official trading name. It is the name that appears on both your checkout page and customer receipts.
- Staff size: This refers to how many people work for the company.
- Industry: This is the sector to which your company is affiliated. For additional information, please check the Help link if you’re unsure which industry would be best.
- Category: Depending on the industry you initially choose, this is the category to which your company falls. For further information, please check the Help link if you’re unsure which category would be best.
- Business type: Here is where you indicate on Paystack that your company is a Starter business.
Important to note: The accurate description of your business is very important. If Paystack cannot determine what your business is about from your business description, it could delay your business activation. Take time to define your business and specify what you will be receiving payments for.
Contact
Fill in all details in the contact section as shown below:
- Business Email: Provide the general email address for your company. If transaction notifications are enabled for your company, you will receive them on this email.
- Support Email: Enter the email address where you'll receive customer support requests and complaints.
- Disputes Email: When banks dispute a charge, those alerts will be sent to this email address(es). You have to respond to transaction disputes before they expire, so make sure that the inbox for the email addresses listed as your dispute emails are checked often by a decision-maker at your organization. More information on chargebacks.
- Phone Number: Enter the phone number of your organization.
- Website Link: Enter the link to your business' website. You can also include the links to your social media pages.
- Twitter: Enter the link to your business's Twitter page.
- Facebook: Enter the link to your business's Facebook page.
- Instagram: Enter the link to your business's Instagram page.
- Office Address: Enter your current office address.
- Registered Address: The official address of your business as shown in your registration documents.
- When you have completed all fields, click on the Save button to update your changes.
Owner
Click Next to provide information about yourself as a business owner. For Starter Businesses, you'll have to provide your name, date of birth, nationality, and identification method:

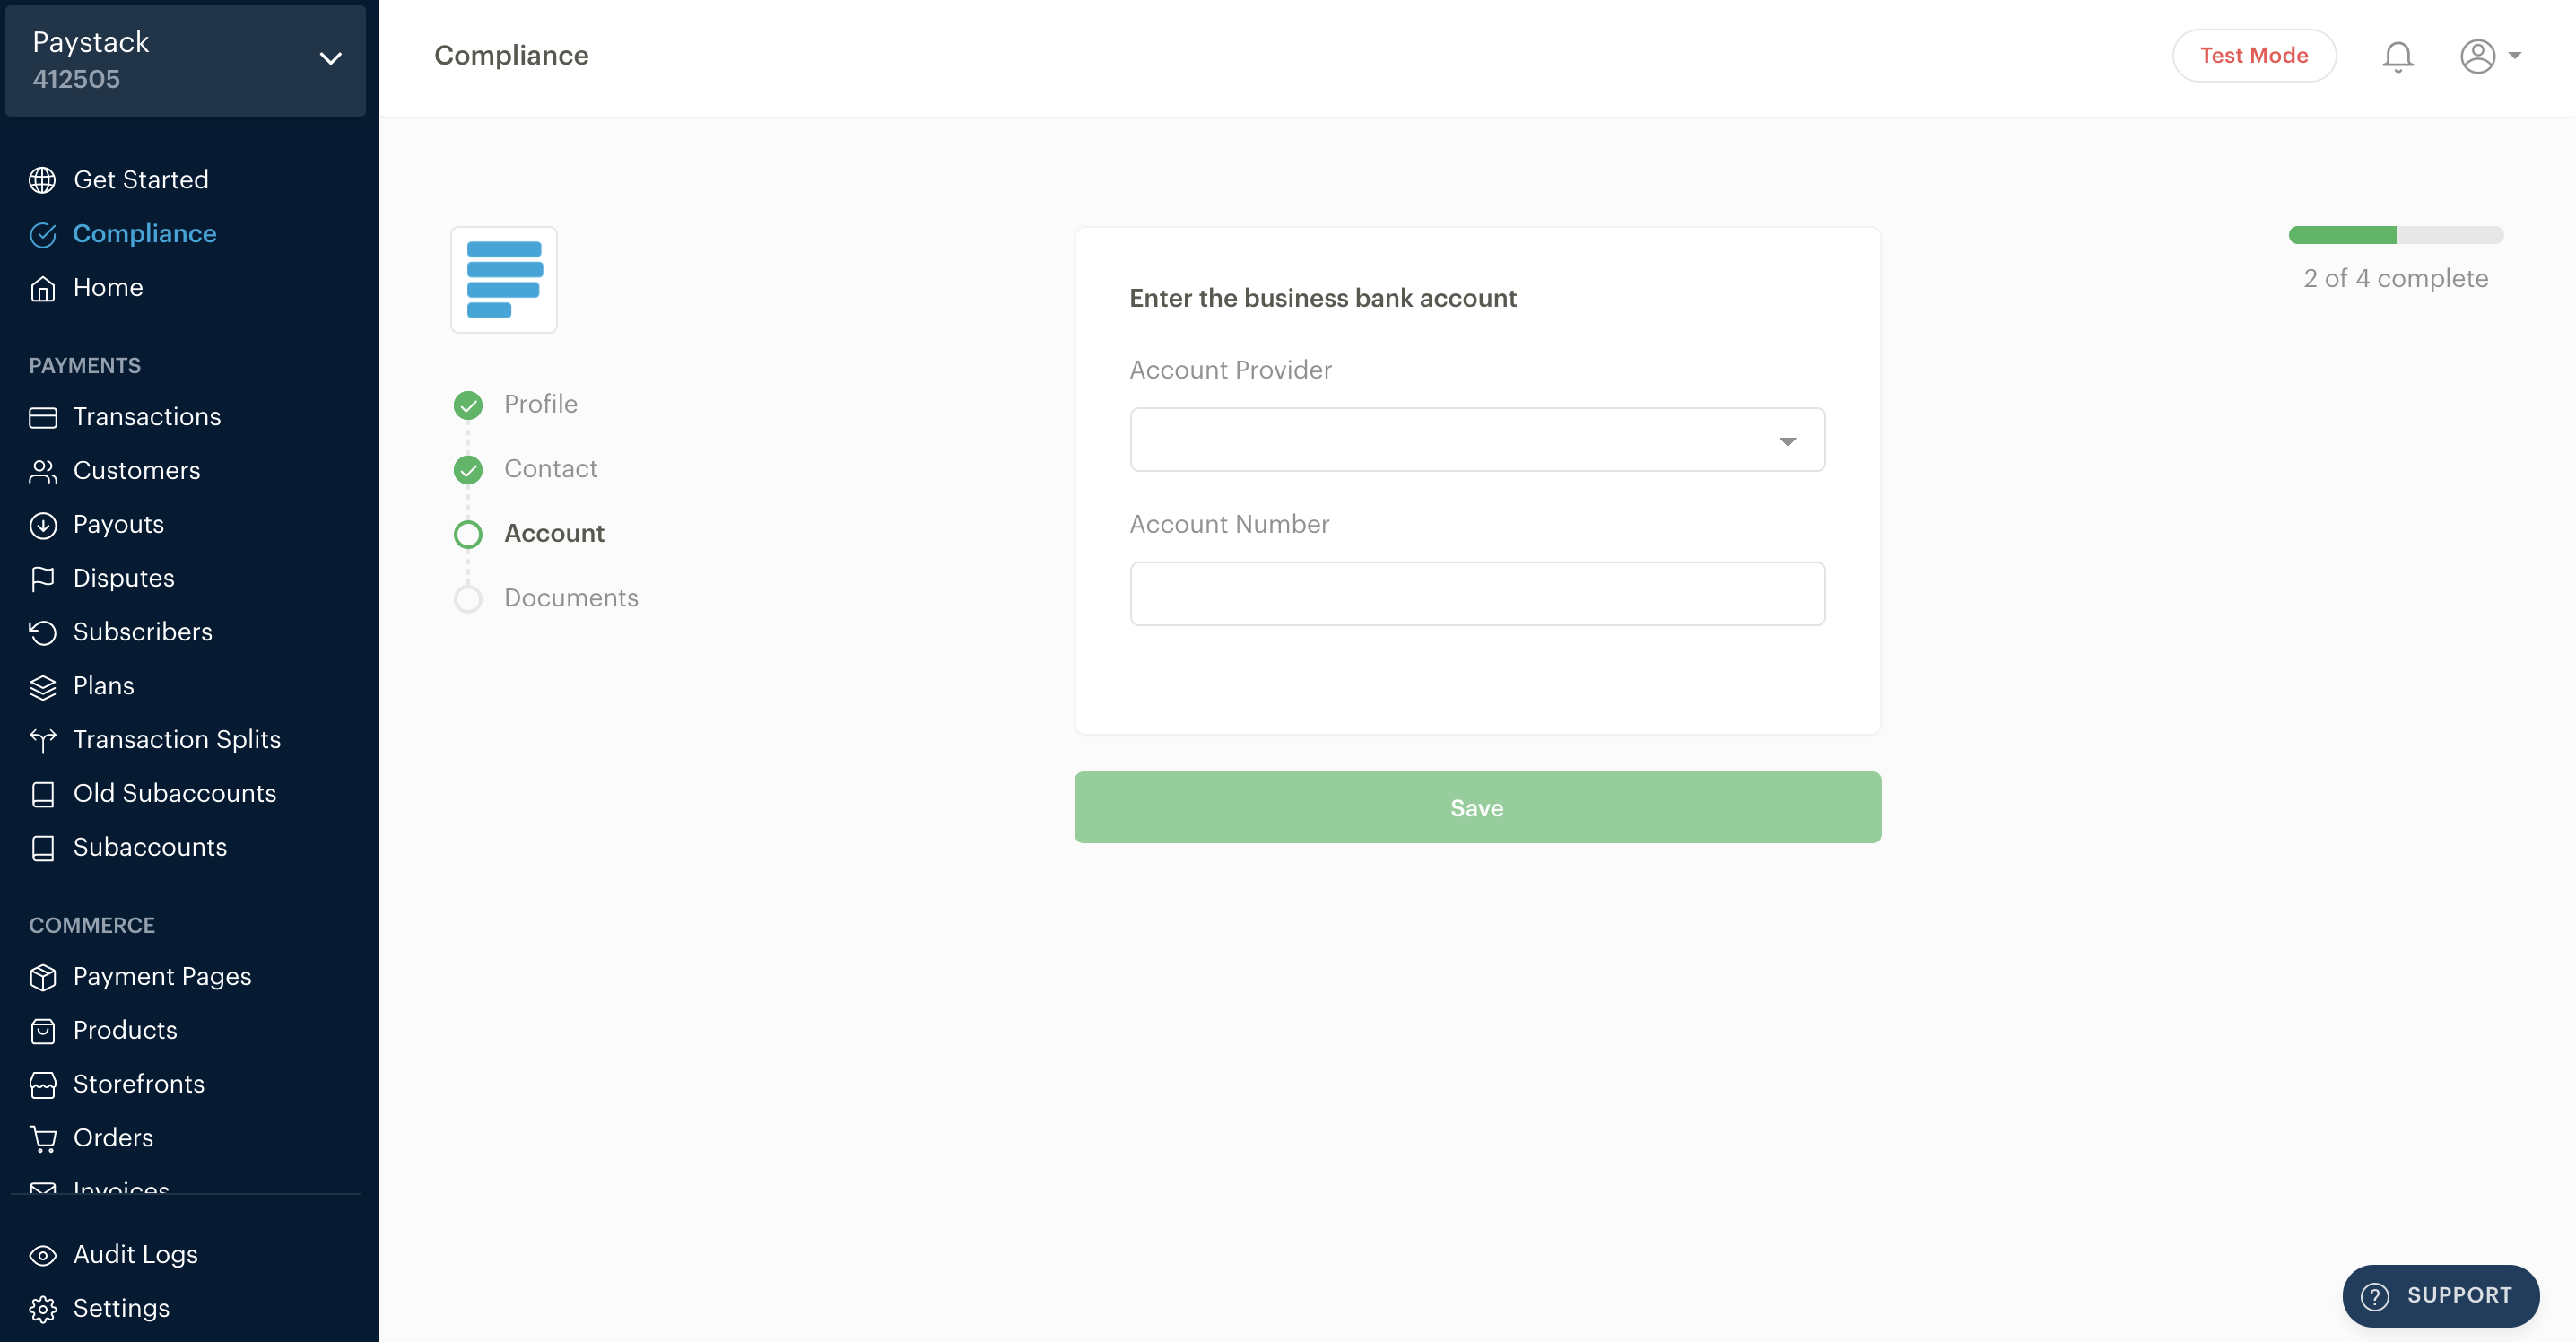
Accounts
Finally, click Next to provide us with information on your payout account. For Starter Businesses, this account must be a personal account:

Click Save to complete this process.
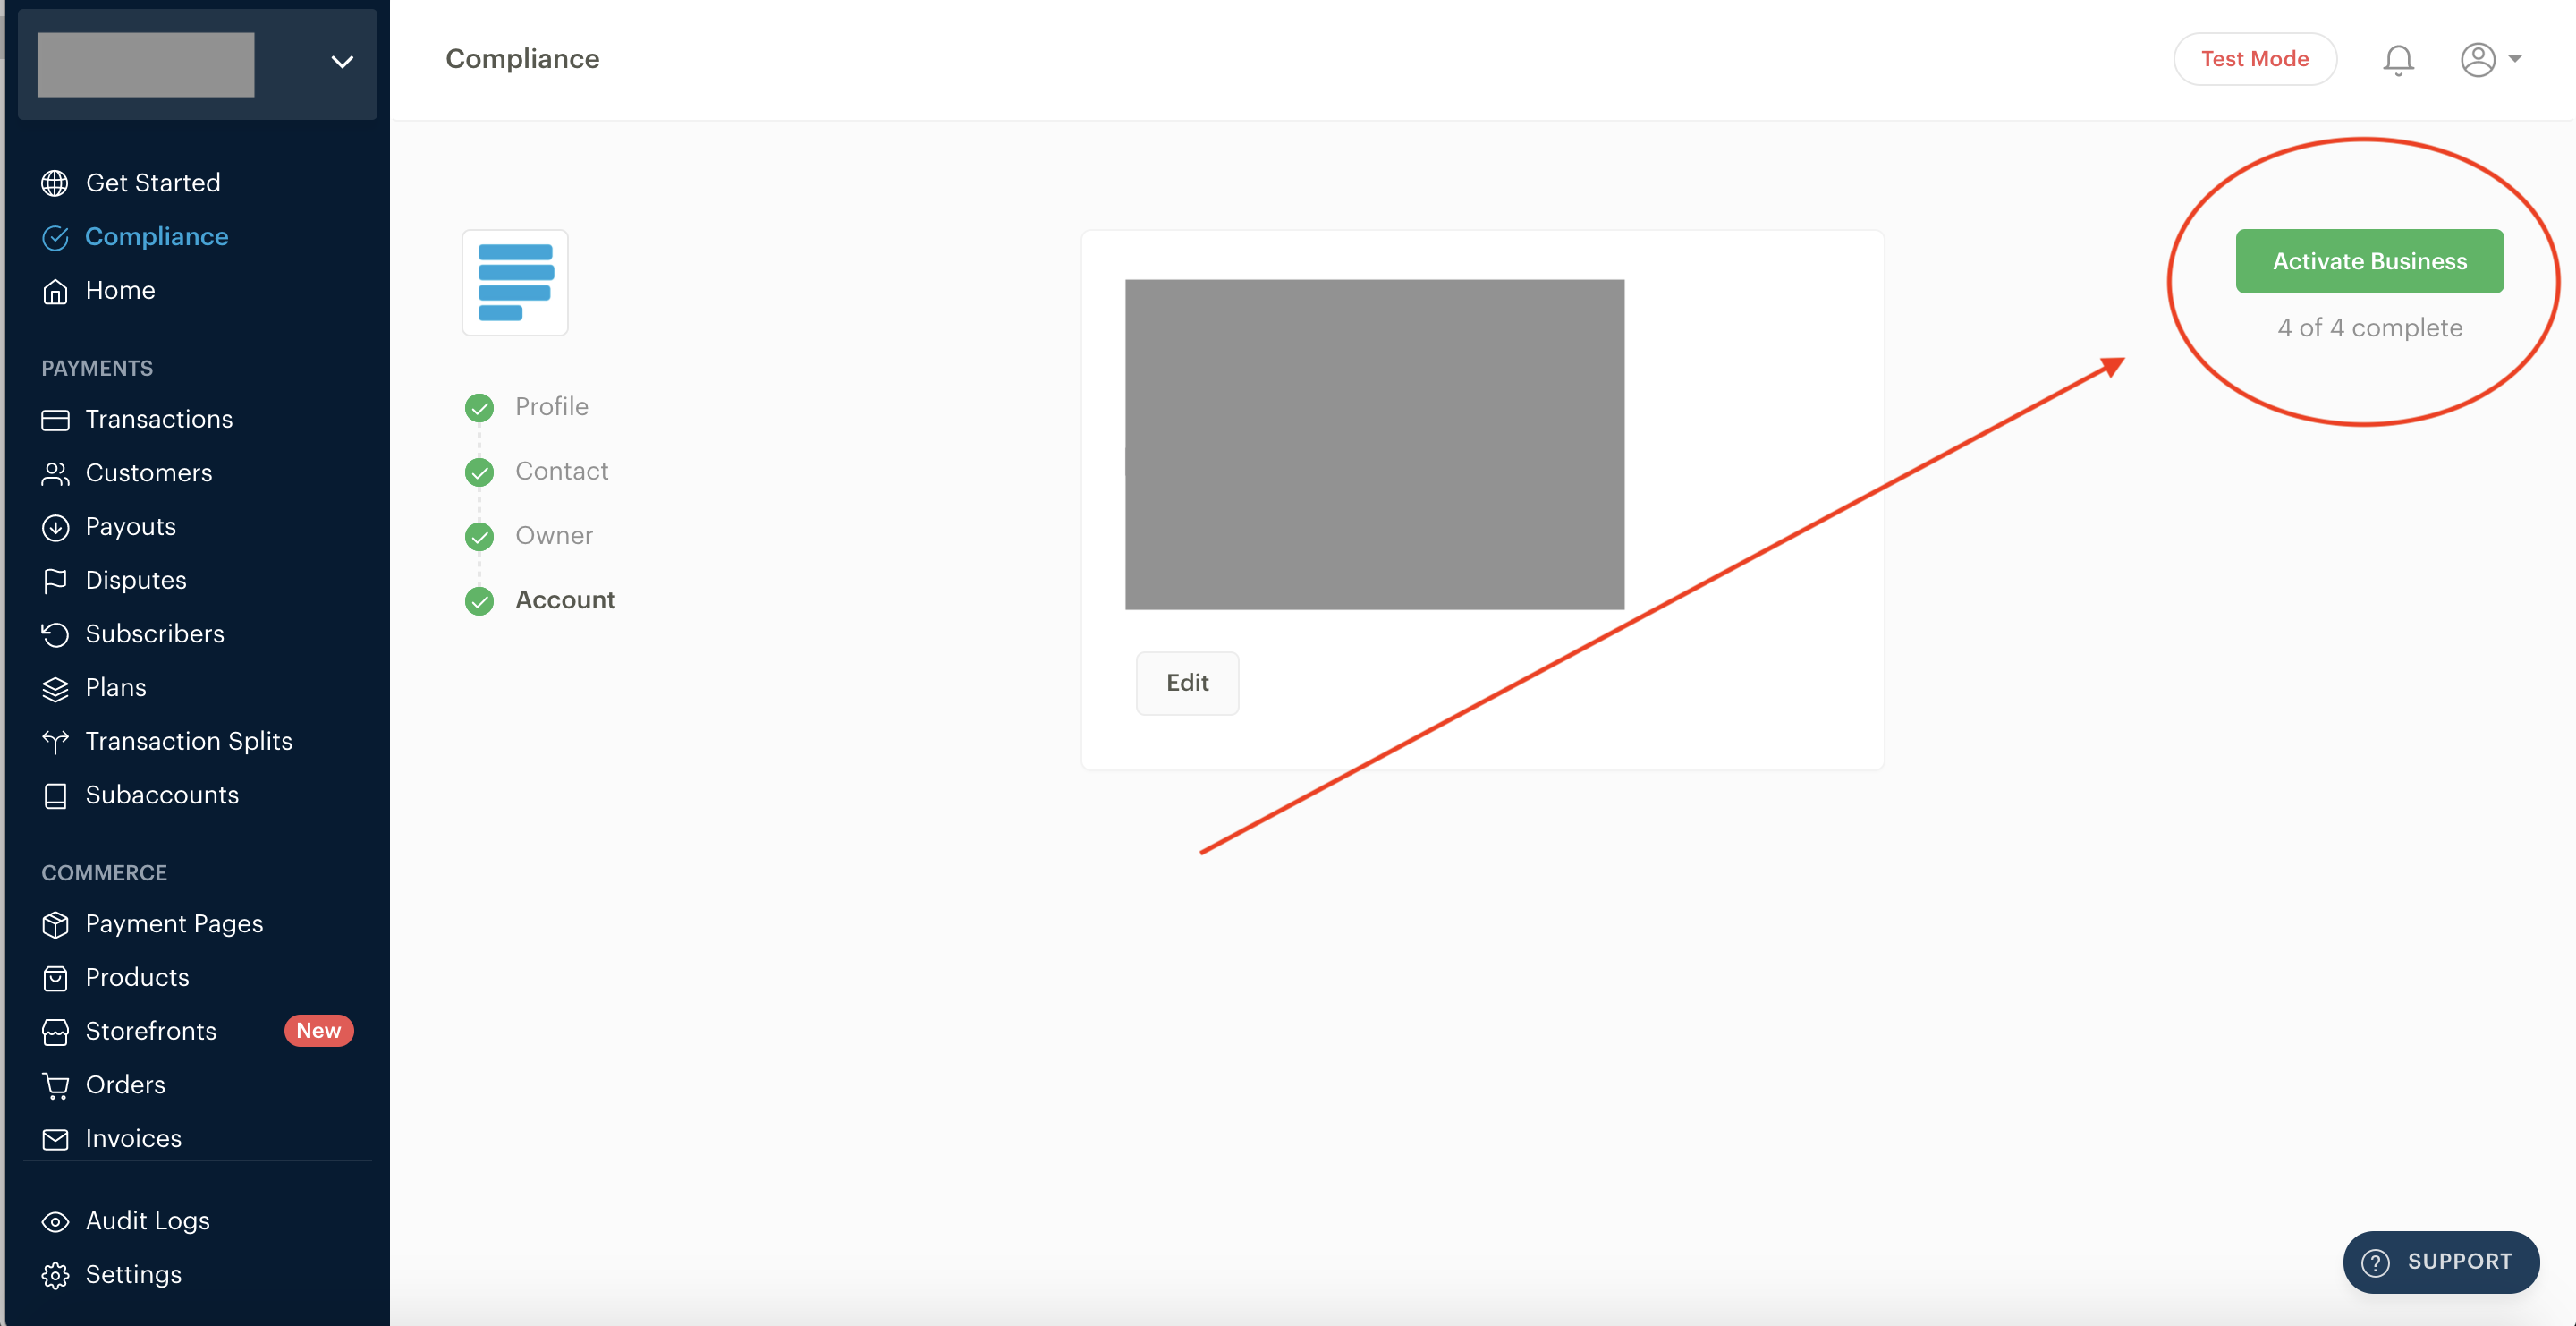
As soon as all 4 sections are filled and completed, you'll see the 'Activate Business' button at the top right of the page. Here is a screenshot of how this looks:
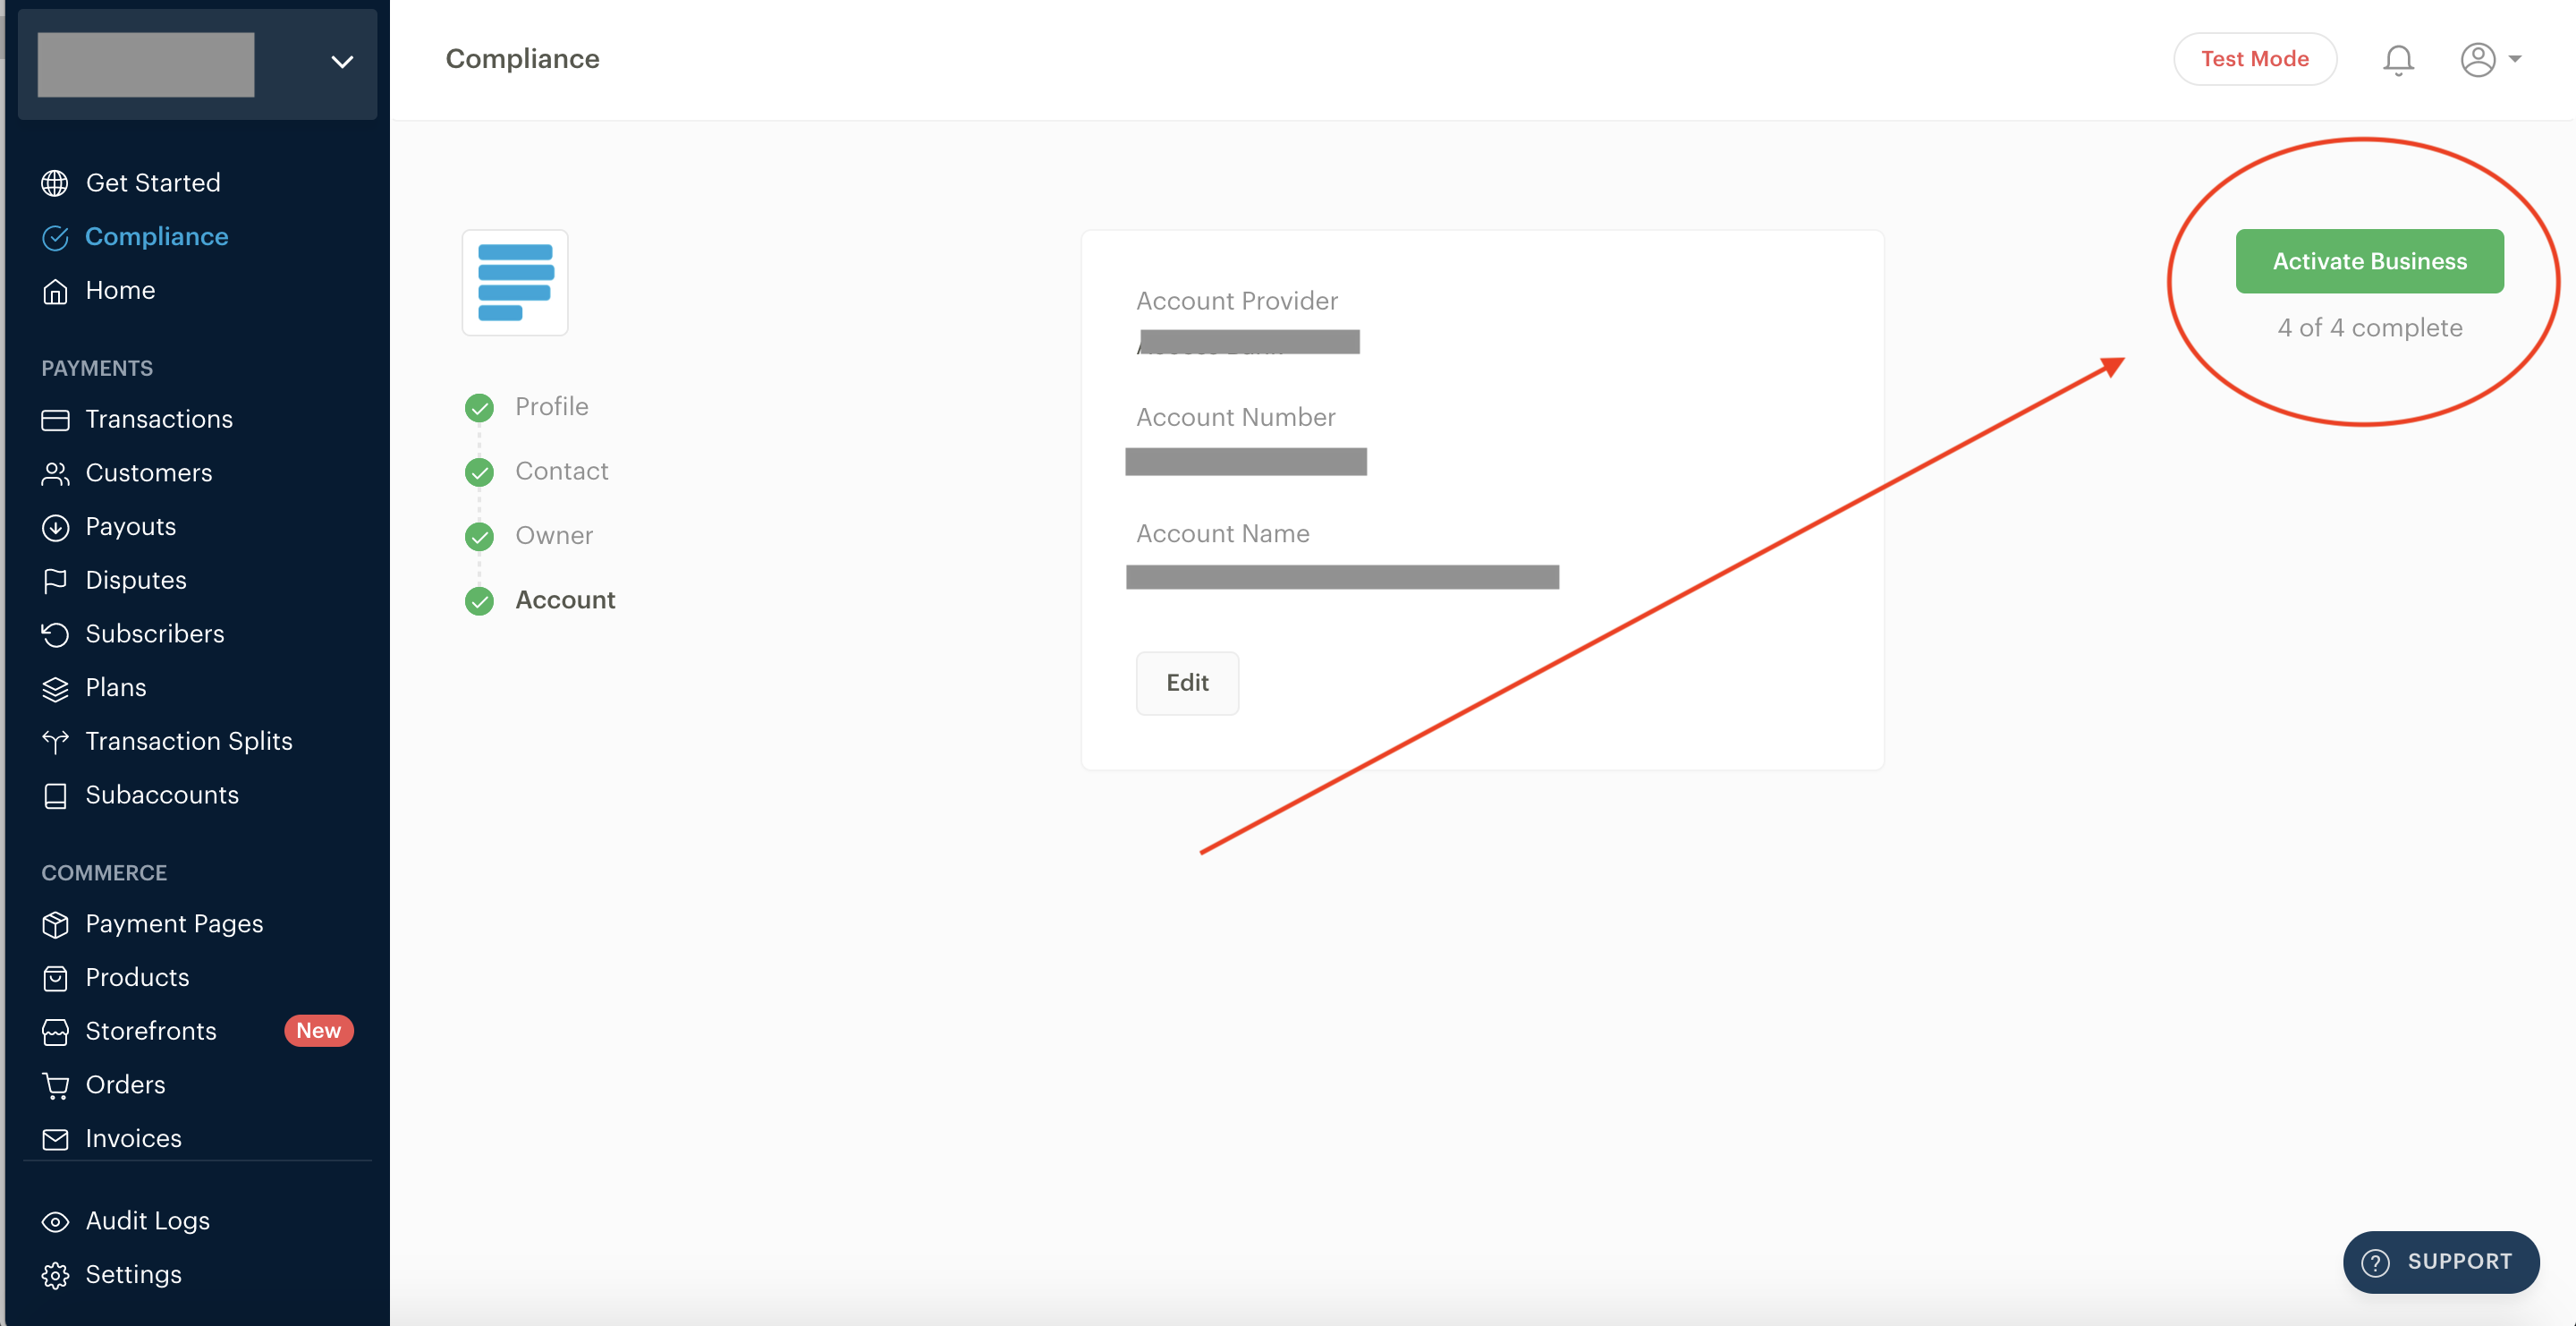
Click on this button to activate your business. Your business will automatically go live, and you can start receiving real payments immediately.
NB: In some cases, the Paystacks review team will have to review all documents provided before activation. If it happens there is a delay, you can reach out to Paystacks via any of their support platforms.
How do I activate my Paystack registered business
All Paystack businesses start in Test Mode so you can fully understand the payment flow before activating your business. In Test Mode, you can integrate with Paystack, use the Dashboard, and make test payments.
To start accepting real money, you need to activate your business by submitting your Compliance forms on the Dashboard. You'll be required to fill in KYC details for your business in four sections that look like this:
Profile
Click on Profile to provide Paystack with a few details about your business and your business category. Make sure to select Registered business as the Business type.

- Trading Name: This is the official trading name of your business. It is the name displayed on your checkout page as well as receipts sent to customers.
- Staff Size: This is the number of staff or employees of the business.
- Industry: This is the industry your business belongs to. If you're not sure of the suitable industry to select, please click the Help link for more information.
- Category: This is the category your business belongs to, depending on the industry you have previously selected. If you're not sure of the suitable category to select, please click the Help link for more information.
- Business Type: This is where you signify that your business is a Registered business on Paystack. To see the difference between Starter and Registered businesses, please click the Learn more
- Legal Business Name: This is where you provide the legal name of your business as stated in your business registration document.
- Registration Type: This is where you provide the type of registration your business has. you can find more information about this on your business registration document.
- Click on Save then click Next to fill in contact information about your business.
Important to note
An accurate description of your business is very important. If Paystack cannot determine what your business is about from your business description, it could delay your business activation. Take time to explain your business and specify what you will be receiving payments for.
Contact
Fill in all details in the contact section as shown below:

- Business Email: Enter your organization's general contact email address. Transaction notifications go to this email if they are turned on for your business.
- Support Email: Enter your business' support email address. Support requests from your customers will be forwarded to this email.
- Disputes Email: When banks dispute a charge, those alerts will be sent to this email address(es). You are required to respond to chargeback emails within 24 hours, so make sure that the inbox for the email addresses listed here is checked often by a decision-maker at your organization. More information on chargebacks.
- Phone Number of the Business: Enter the Phone number of your business/organization.
- Website Link for the Business: Enter the link to your business' website. Also, include the links to your social media pages.
- Twitter: Enter the link to your business's Twitter page.
- Facebook: Enter the link to your business's Facebook page. Instagram: Enter the link to your business's Instagram page.
- Registered Address: Provide the best physical location at which to find the key members of your team.
- Office Address: Provide the official address of your business as shown in your registration documents.
- When you are done, click on the Save button to update your changes.
Account
Click Next to provide us with information on your payout account. For a Registered business, this account must be a corporate bank account with the same name as your business registration document. You can refer to the image below:
Documents
Click Next to provide us with business registration documents to verify your business. The document requirements here vary by country, and by business industry. You will be required to provide documents that relate to your industry. You can refer to the image below:

Click on Save to complete this process.
As soon as all four sections are filled and completed, you'll see the Activate Business button at the top right corner of the page:
Click on this button to activate your business. Your business will automatically go live, and you can start receiving real payments immediately.
How to get API keys
Generally, Paystack provides both public and secret keys. By design, public keys cannot modify any part of your account besides initiating transactions with you. The secret keys, however, are to be kept secret. If for any reason you believe your secret key has been compromised or you wish to reset it, you can do so from your Paystack dashboard.
How to connect Paystack to NEXT BASKET
- First, log in to your next basket account.
- In the admin panel click.

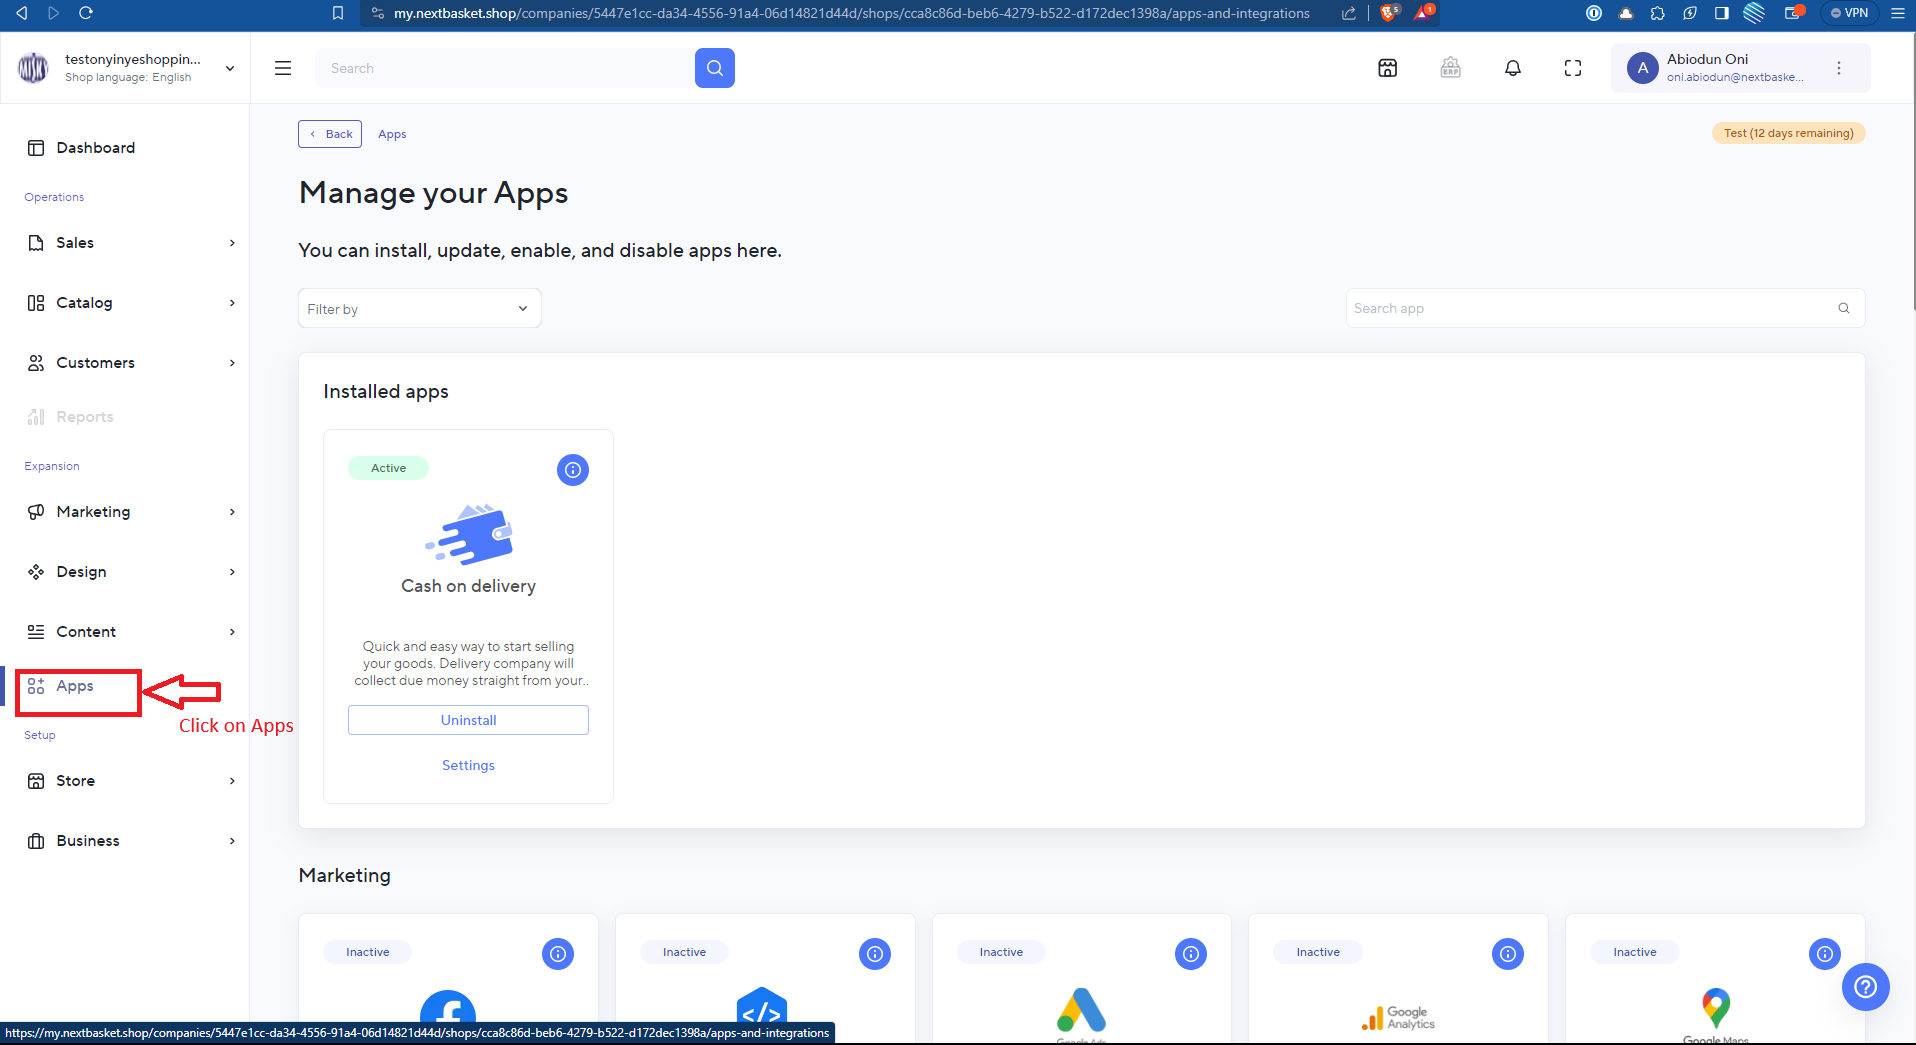
- Go to the Apps.
- 5. Navigate to Payment providers and locate the Paystack app, then click on Install to make the Paystack app active.
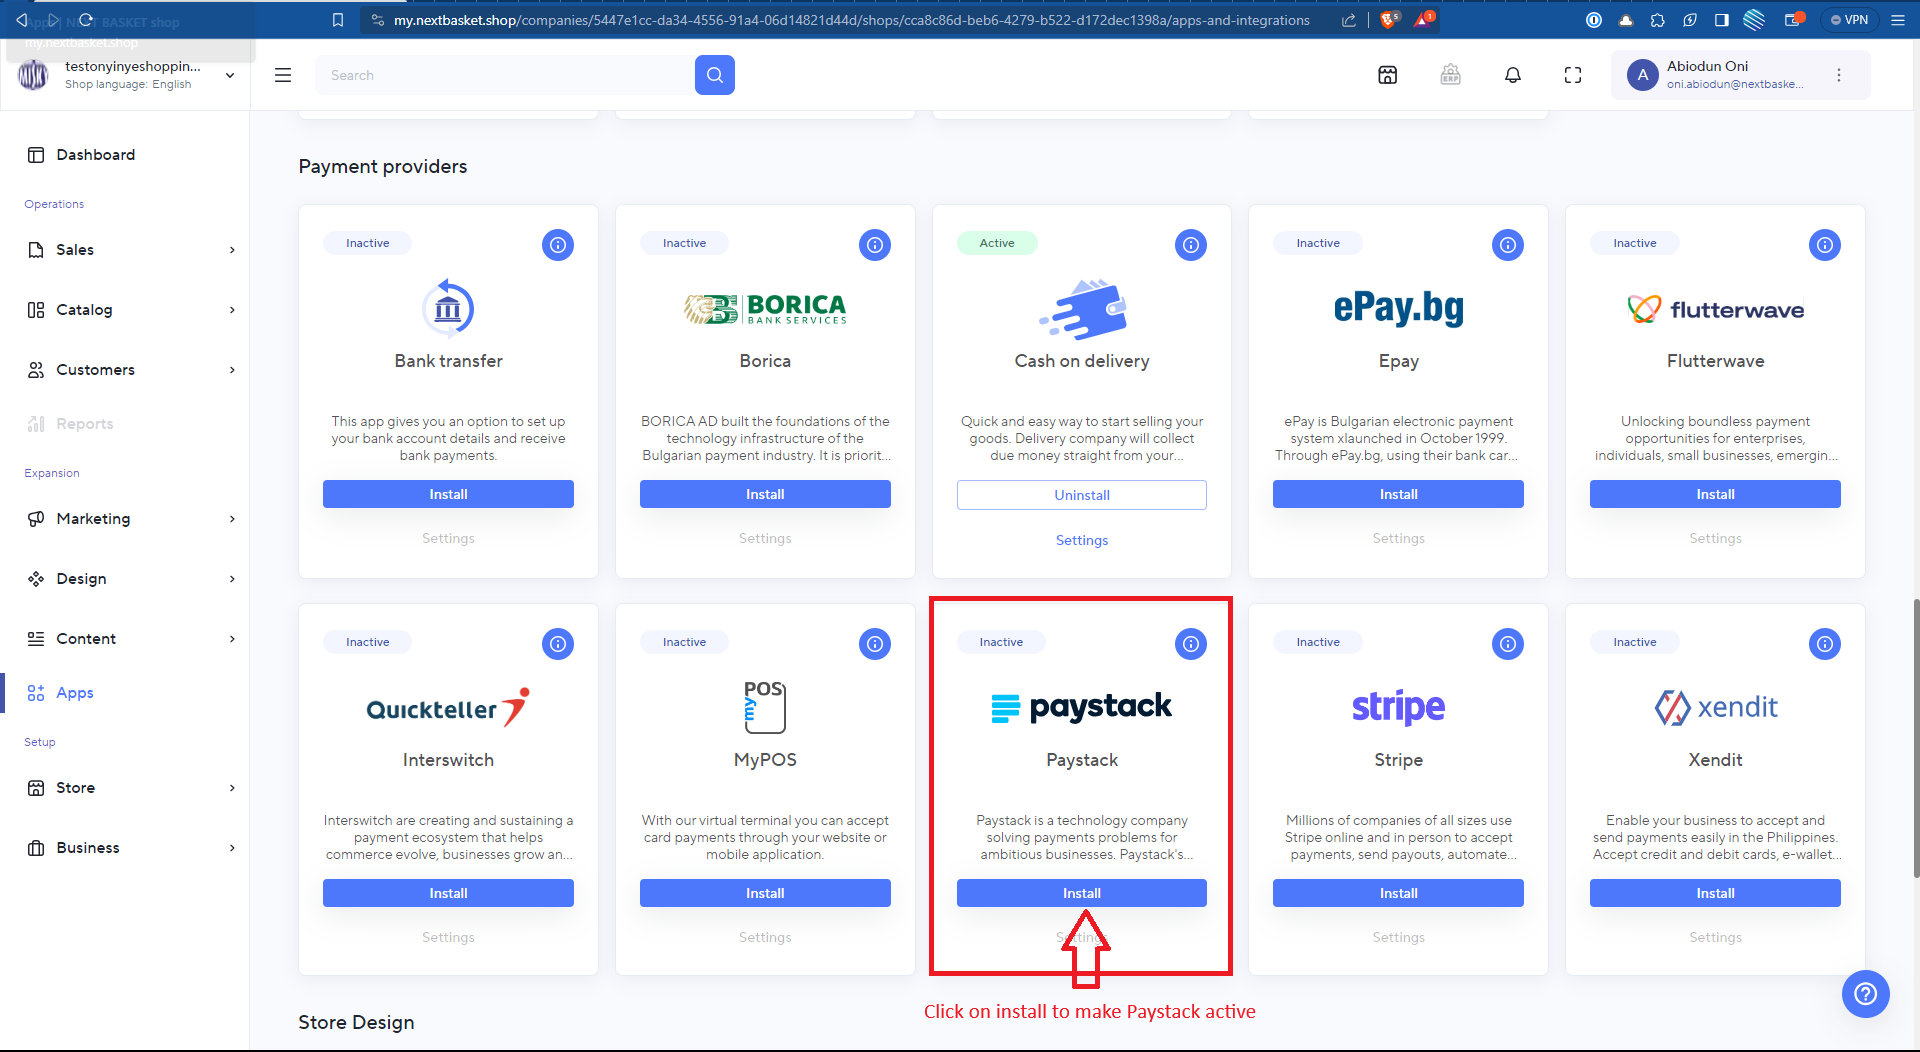
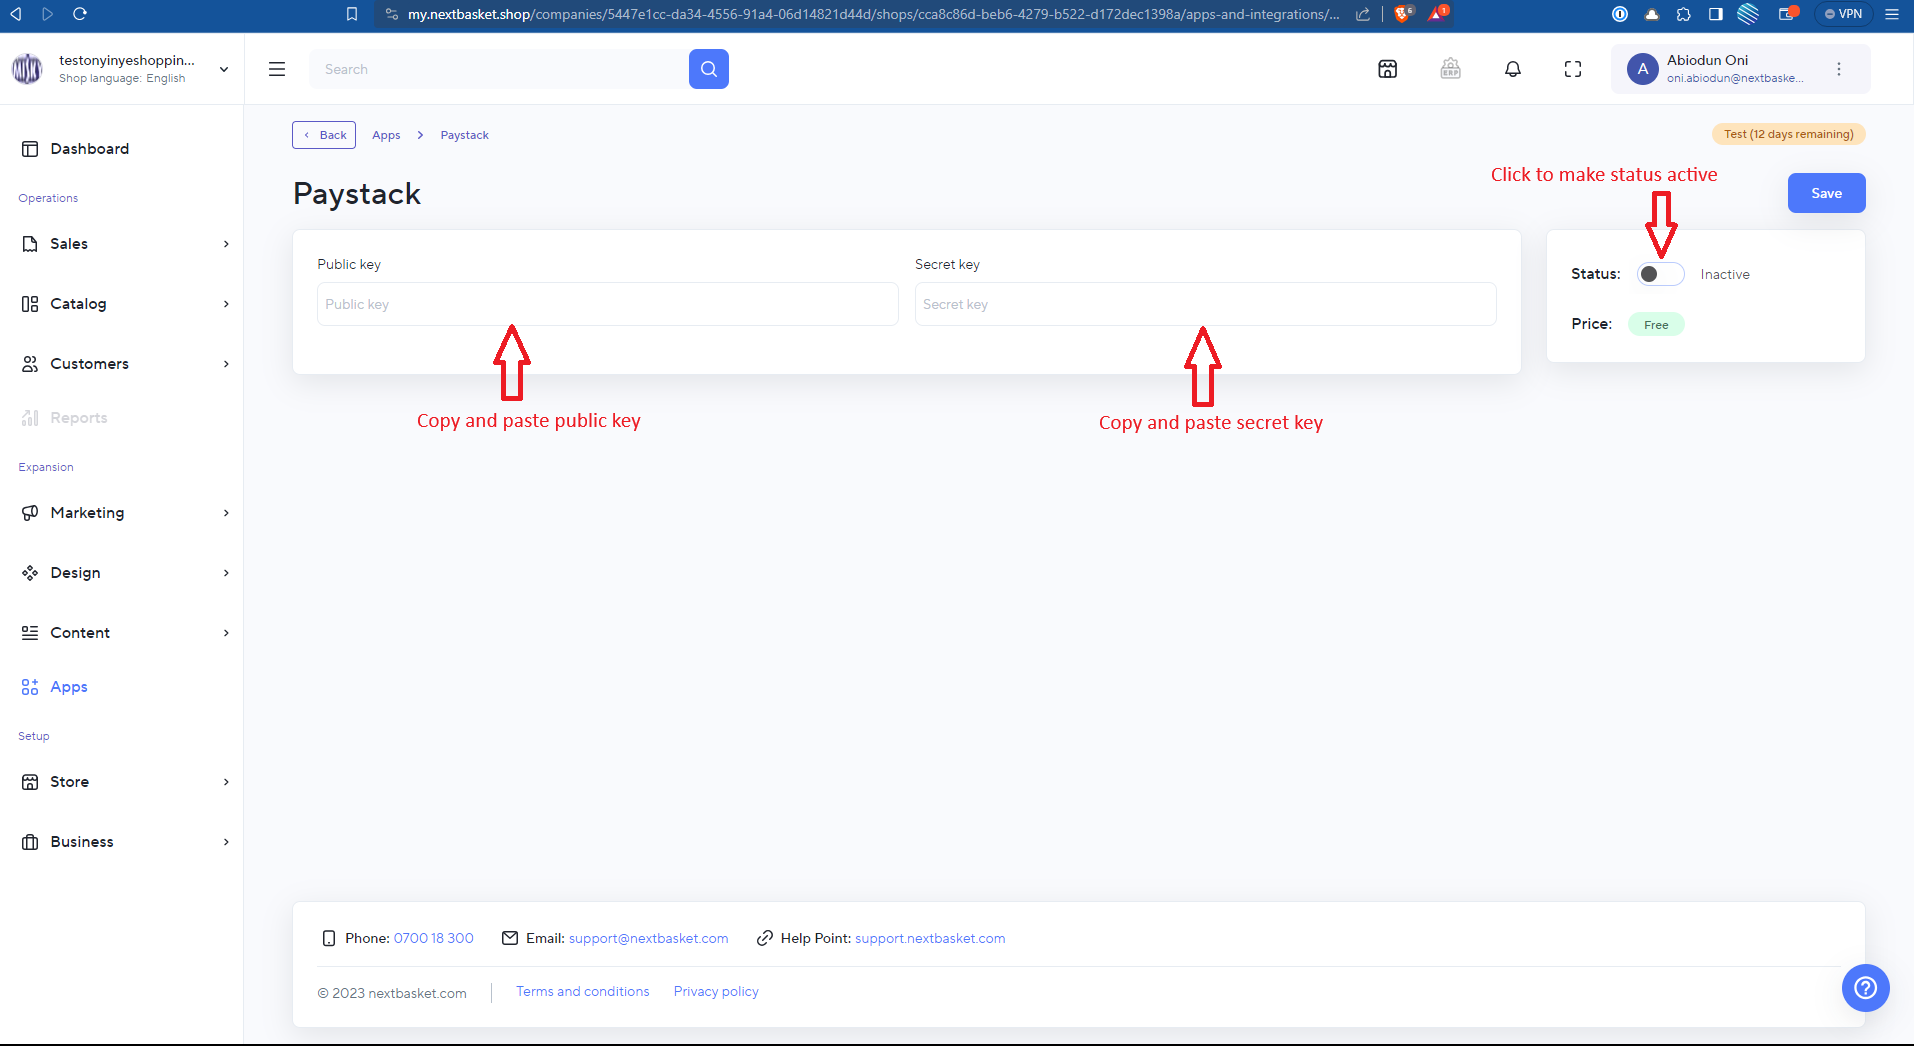
6. Once it’s down installing, the settings button will become active, click on it to proceed to configure the API keys.
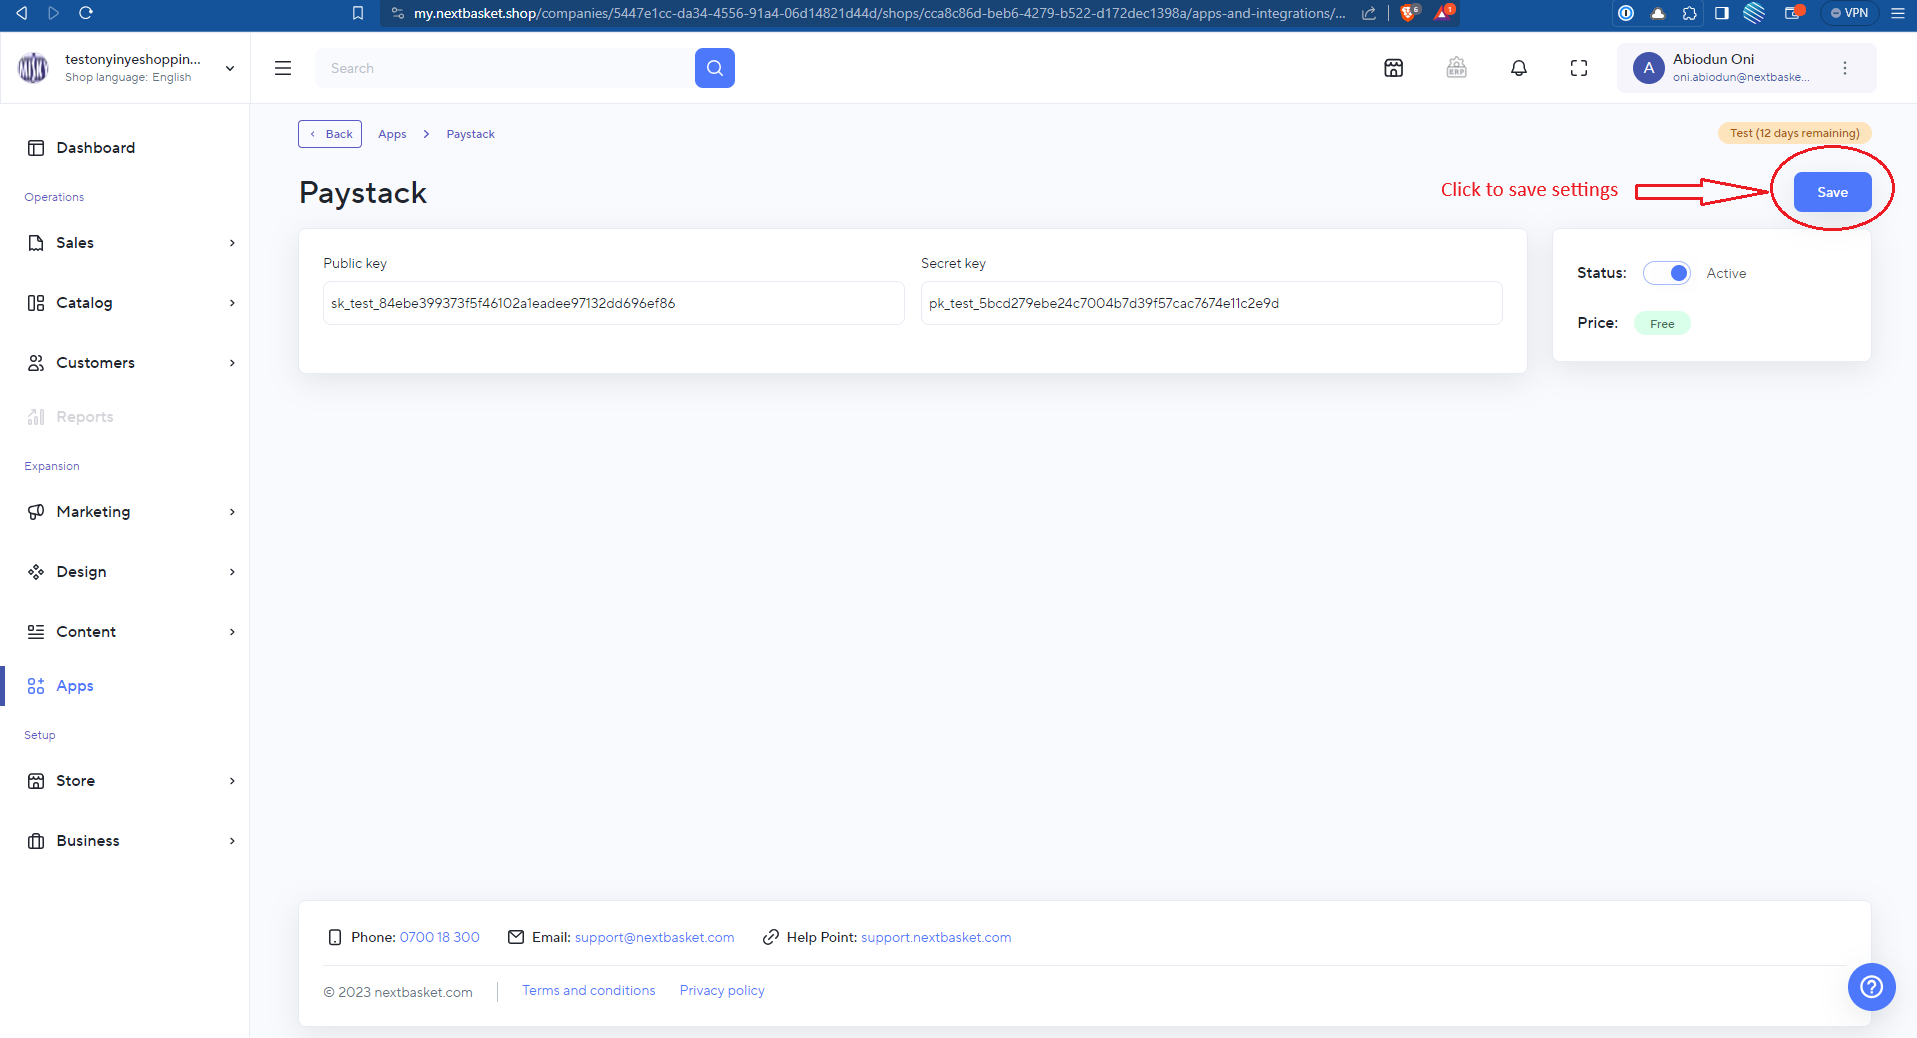
7. Copy and paste your public key and secret key you got from your Paystack.
Then toggle the status button on to make it active.