Streamline your inventory management with the flexible product data import and export features in our ERP system.
Export product data
- Log in.
- Select the Inventory module.

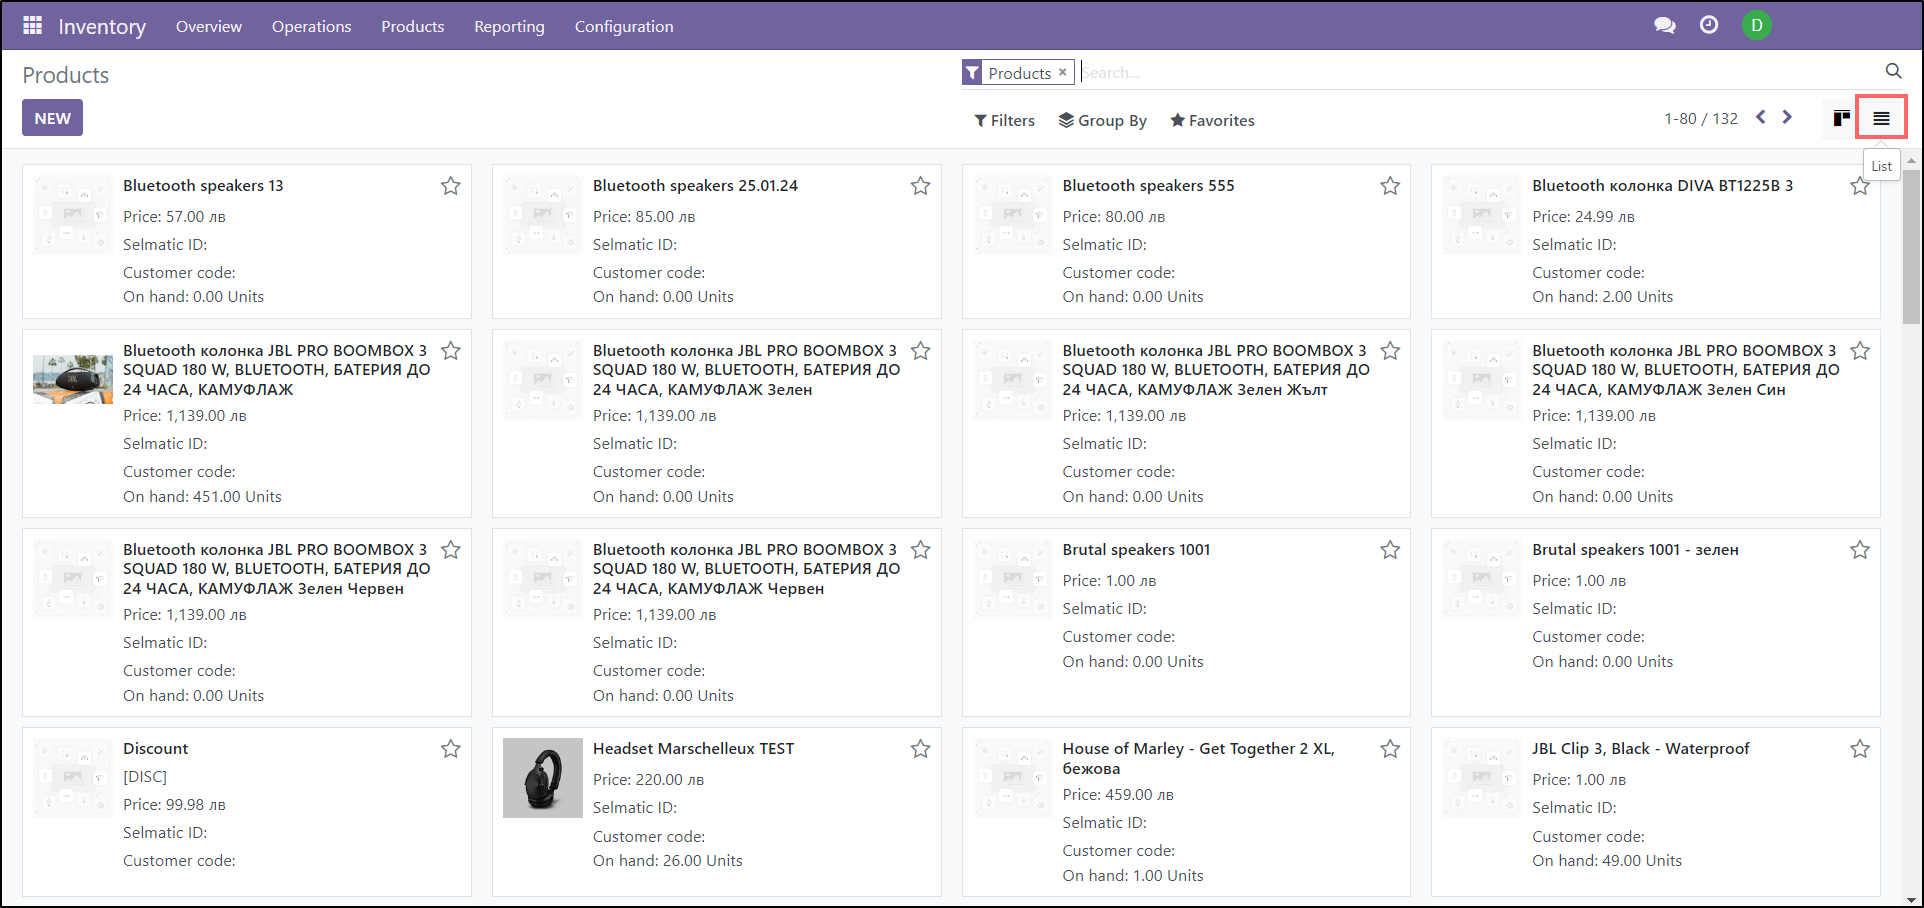
- Navigate to the Products submenu and select the Products option.

- Select List view of the products.

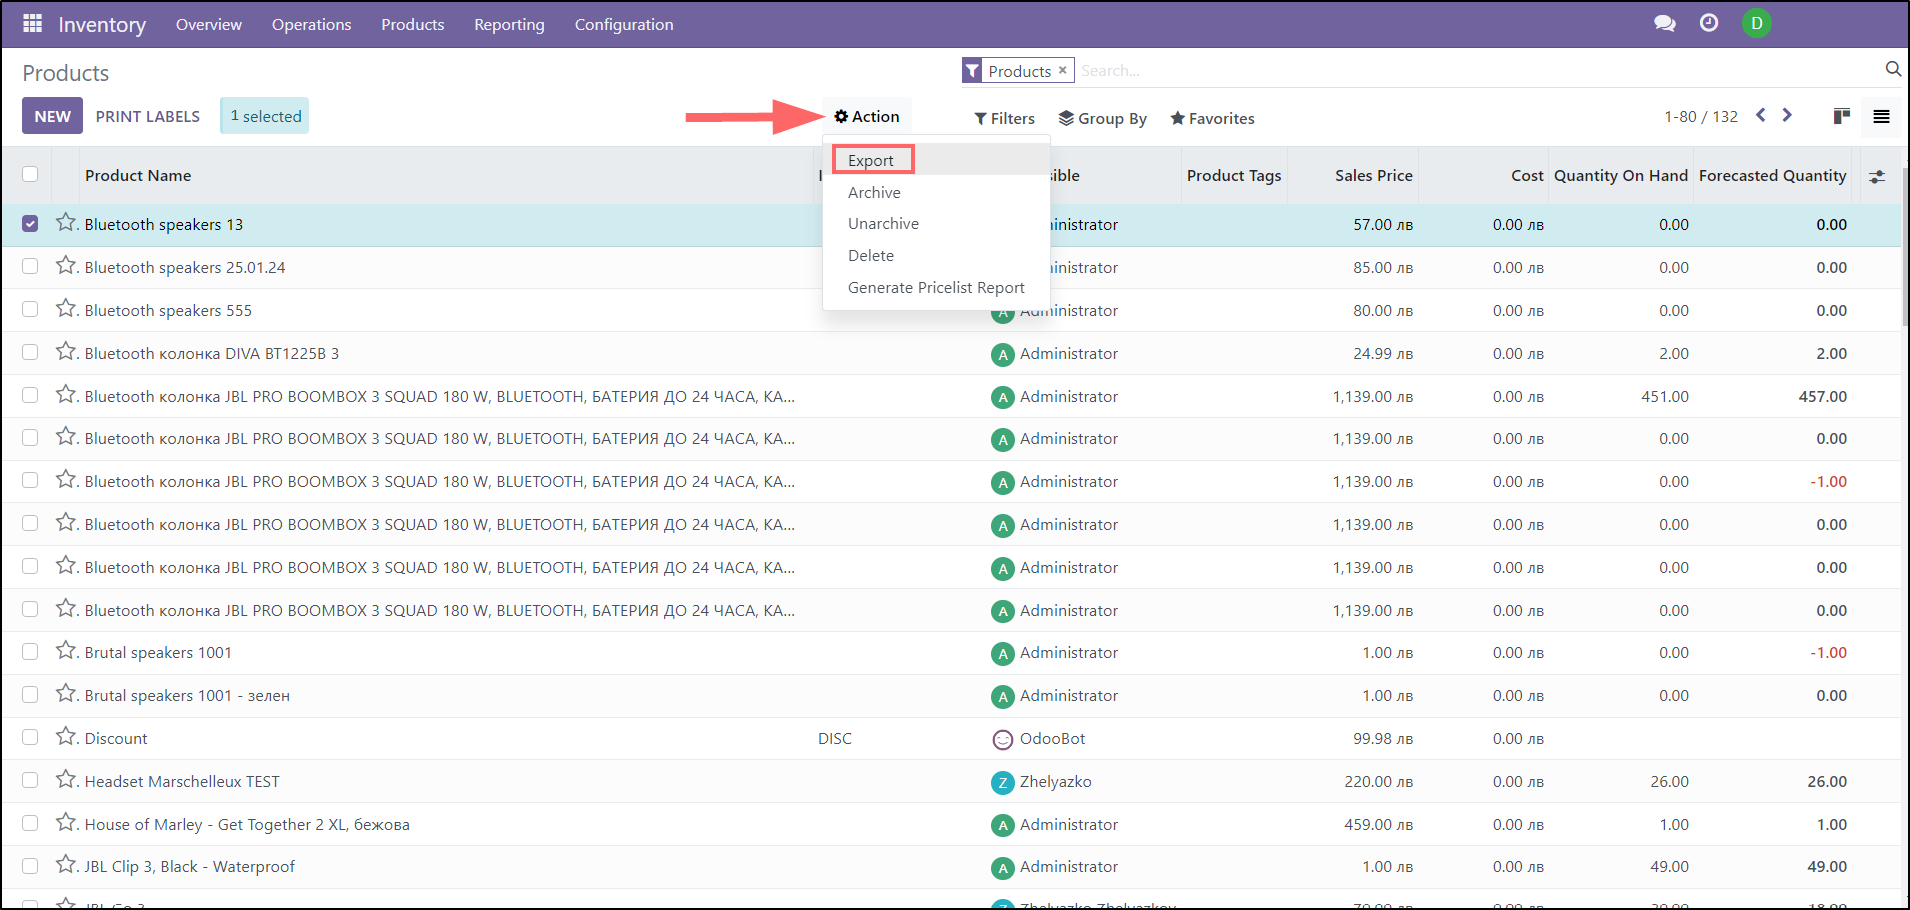
- Select the specific product(s) you wish to export.
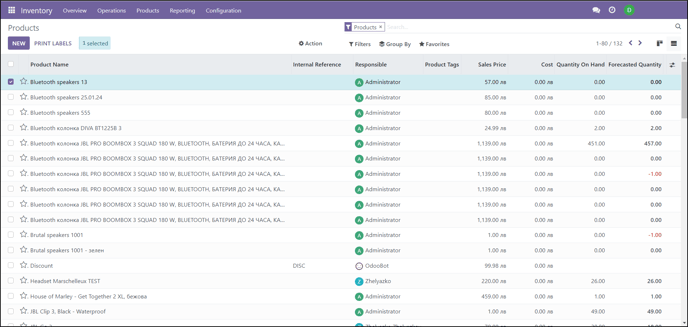
- Click the Actions button and select Export.

- Complete the process by pressing the Export button.
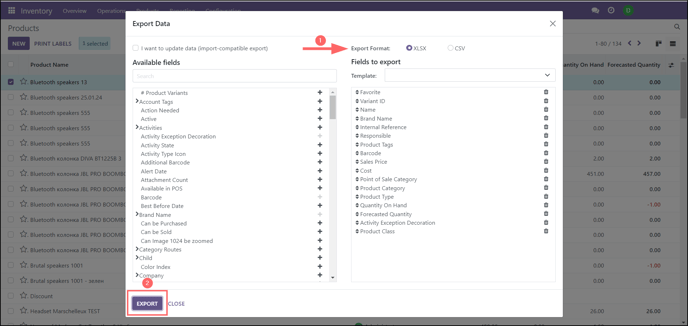


Customize the export report by selecting the fields to be included or excluded and the format you want it exported to - XLSX or CSV. 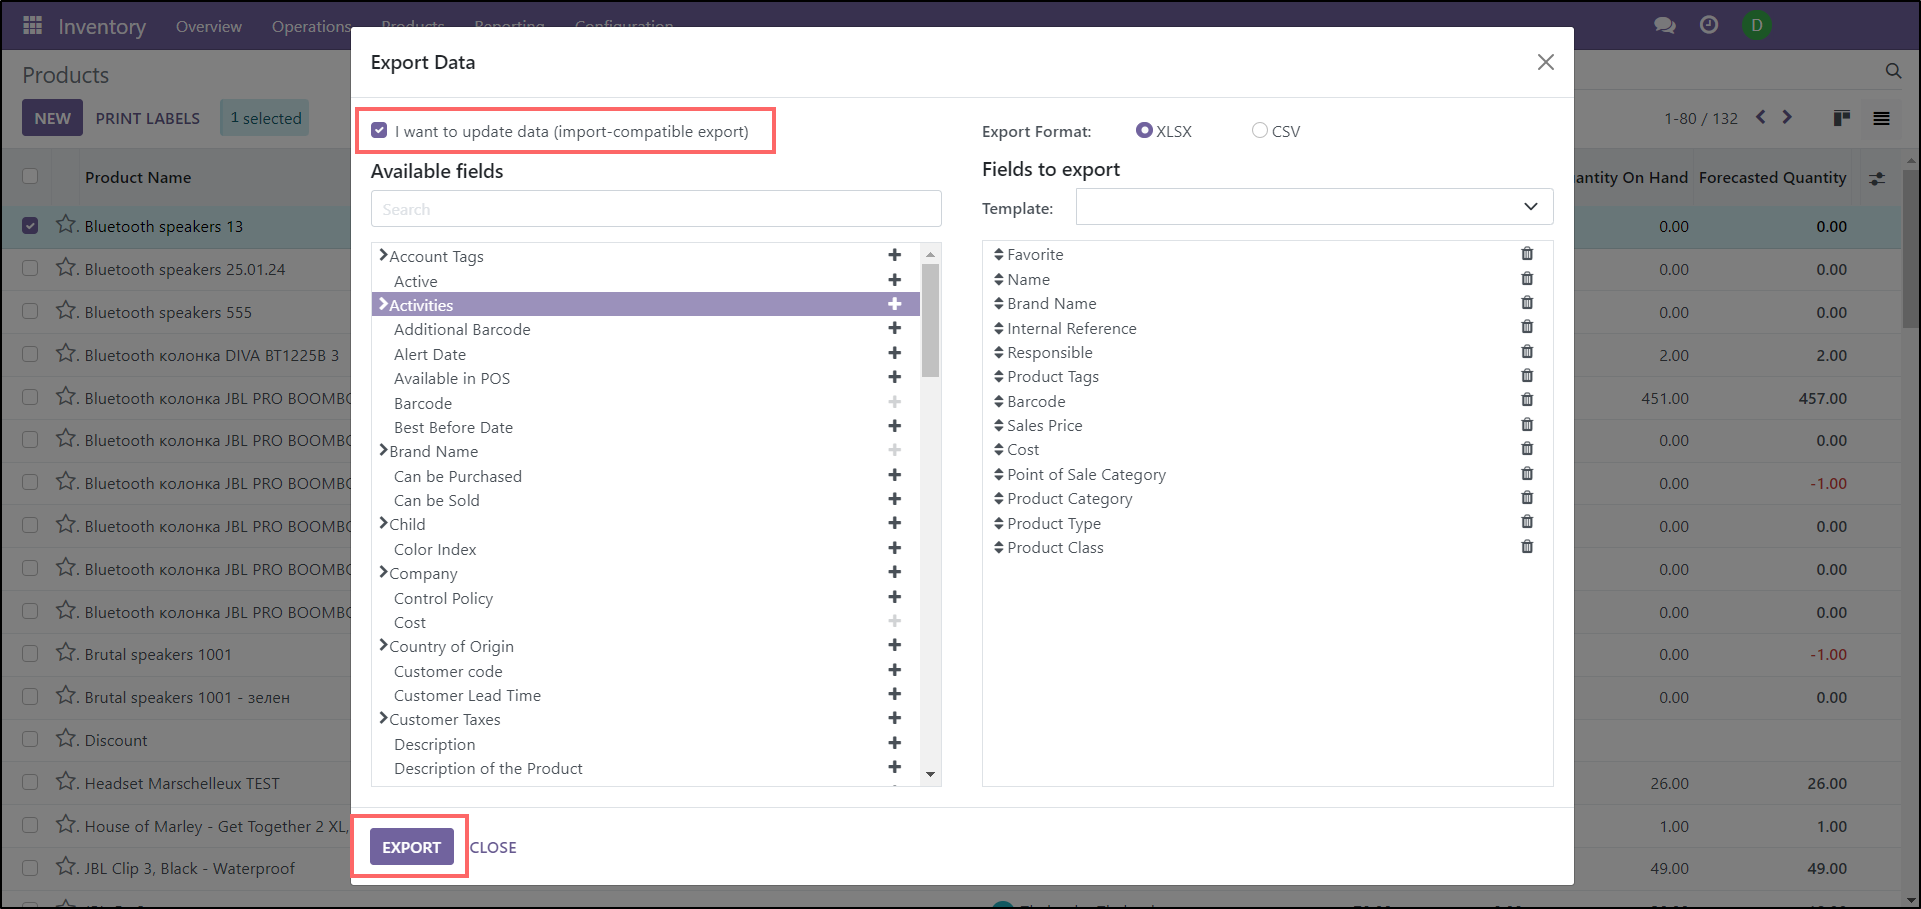
Important: If you select the I want to update data option the system will automatically adjust the Available Fields and Fields to export to the fields that allow updates, removing the ones that don't. Useful for importing data when you want to update information on an existing product. This option includes an ID field in the exported file that corresponds to the existing product ID, so the system recognizes which product to update.
Import product data
Steps to import product data:
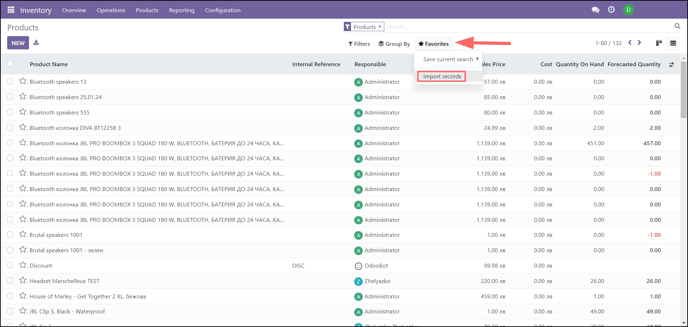
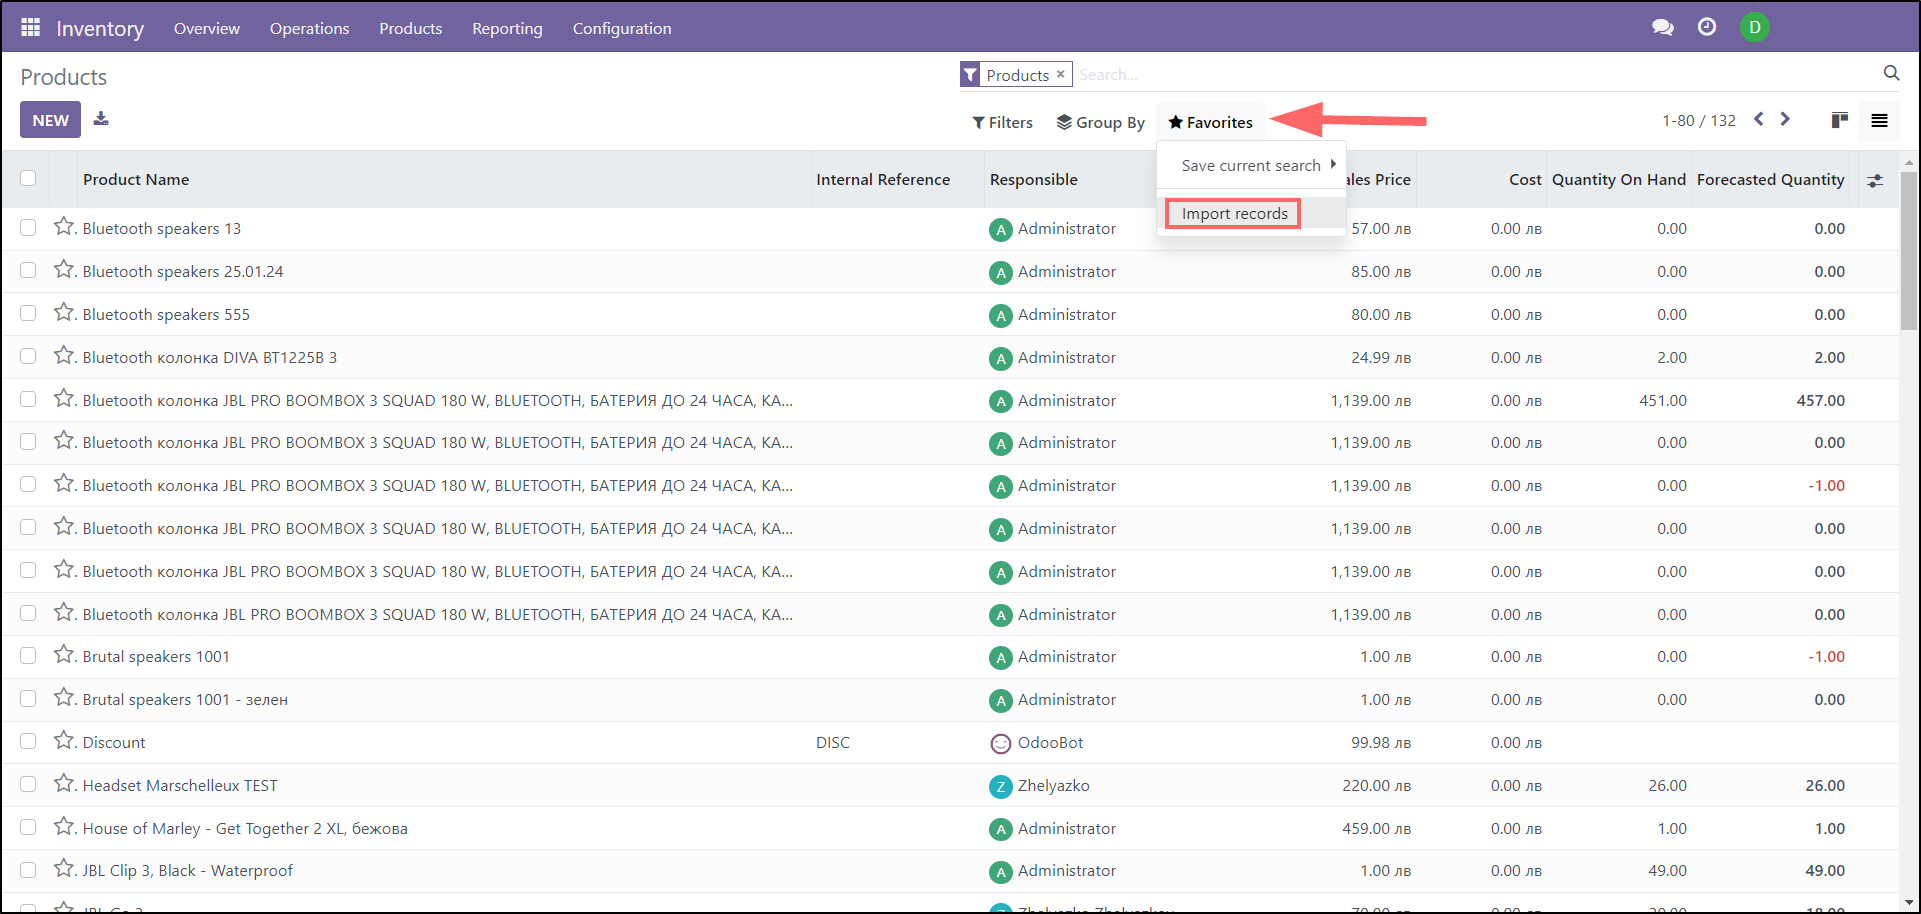
- Go through the previous navigation steps (1-4) again.
- Click the Favorites button and select Import records from the available options.
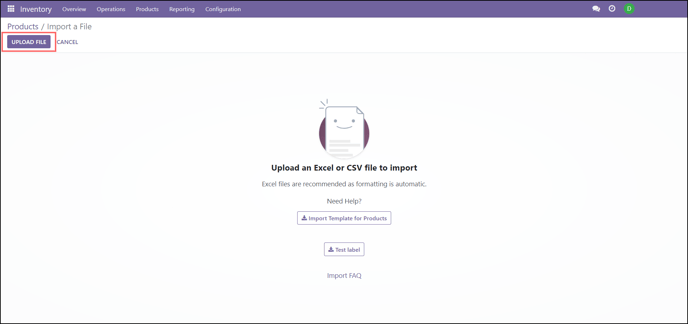
- Upload a file in CSV or XLXS format, verifying that the fields contain valid information (e.g., making sure the category exists).
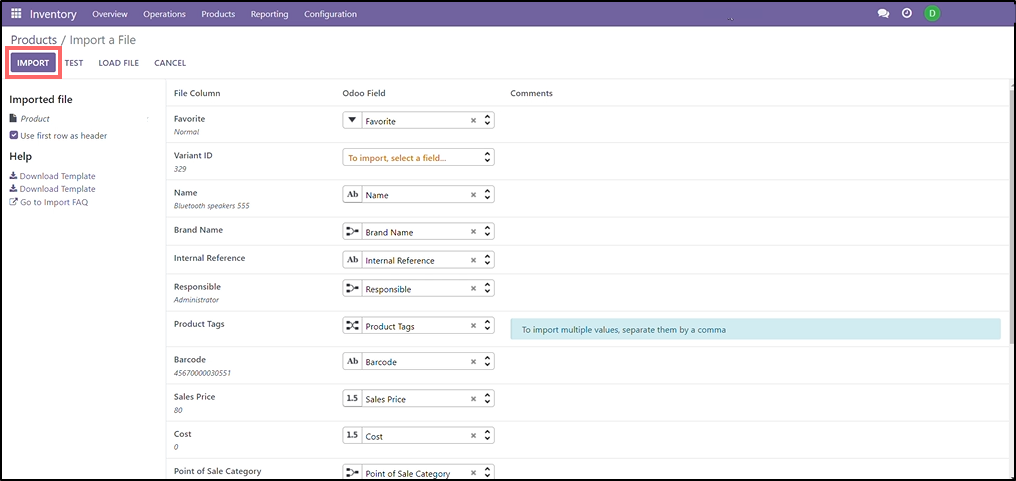
Once the file is uploaded, a new form will appear that contains information about the mapping between the file columns (File Column) and the ERP system fields (Odoo Field), as well as 4 possible actions to take with the import file: 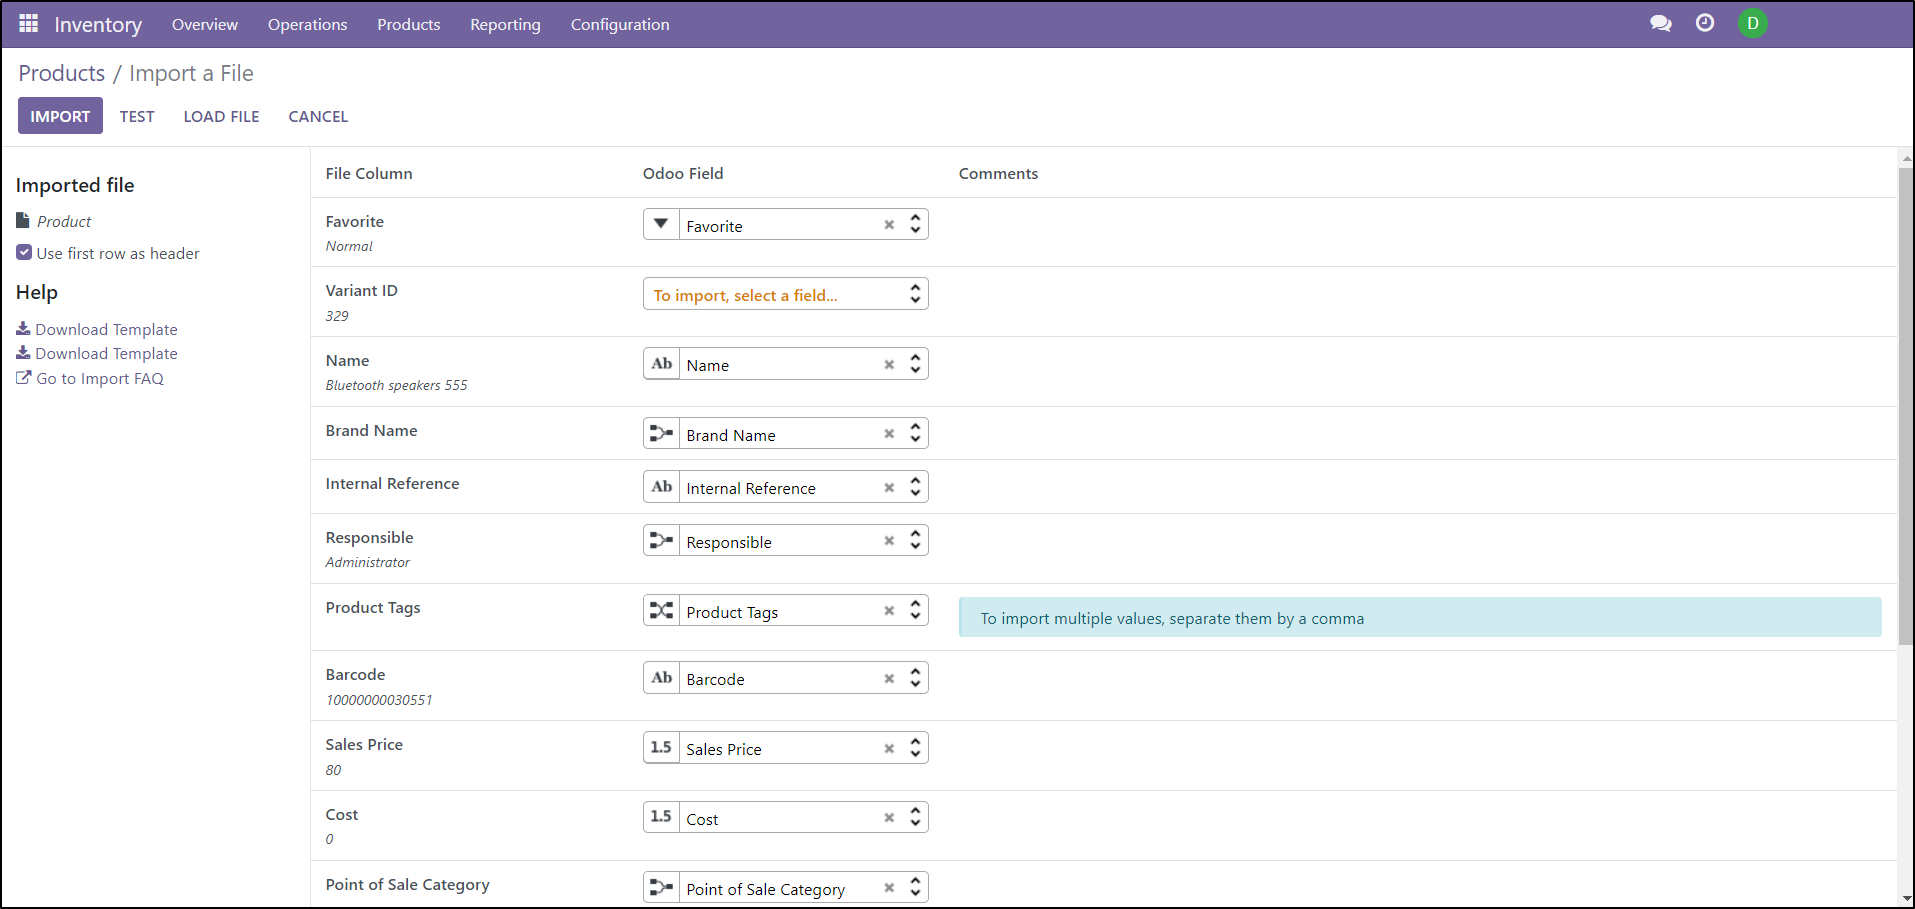
- IMPORT - this button will trigger the import of the uploaded file.
- TEST - this button will run a test to verify that all fields are filled in and mapped correctly.
 If any of the information in the file is missing or incorrect, a system message will indicate the type of error.
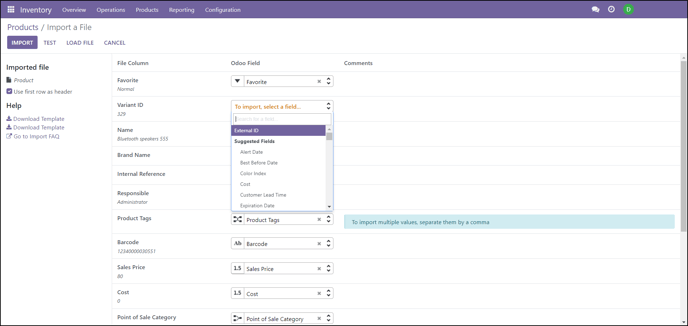


Note: When mapping the fields, sometimes there may be a difference between the name in the file and the name in the ERP system. In this case, select an option from the drop-down menu that matches the field name in the ERP.

If all the information in the file is correct, a system message will indicate that the file is ready for import.
- LOAD FILE - this button allows you to select a file to import (after making corrections to the file, as prompted by the system message previously).
- CANCEL - this button will cancel the import operation.