Swift and easy integration of Quickteller Interswitch with NEXT BASKET
To get started with Quickteller (Interswitch) Business, you'll need to set up an account. It's a straightforward process that involves a few steps.
- Visit the Quickteller Business website.
- Click the Get Started button in the top right corner.
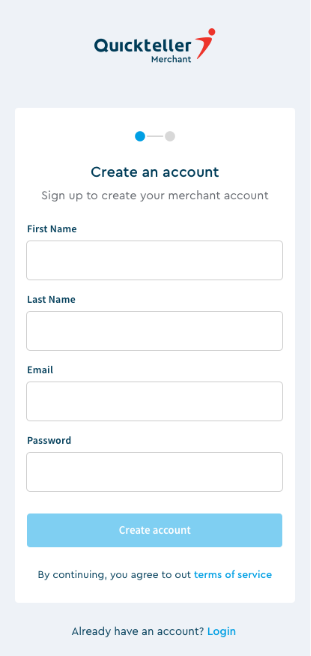
- Enter your basic information, including your first name, last name, email address, and a strong password.
- Click Create account to submit your details.
Once you've verified your account, you'll be able to access the full range of Quickteller Business features and start receiving payments from your customers.
Now that you've got your account, let's build your business on Quickteller! Here's how:
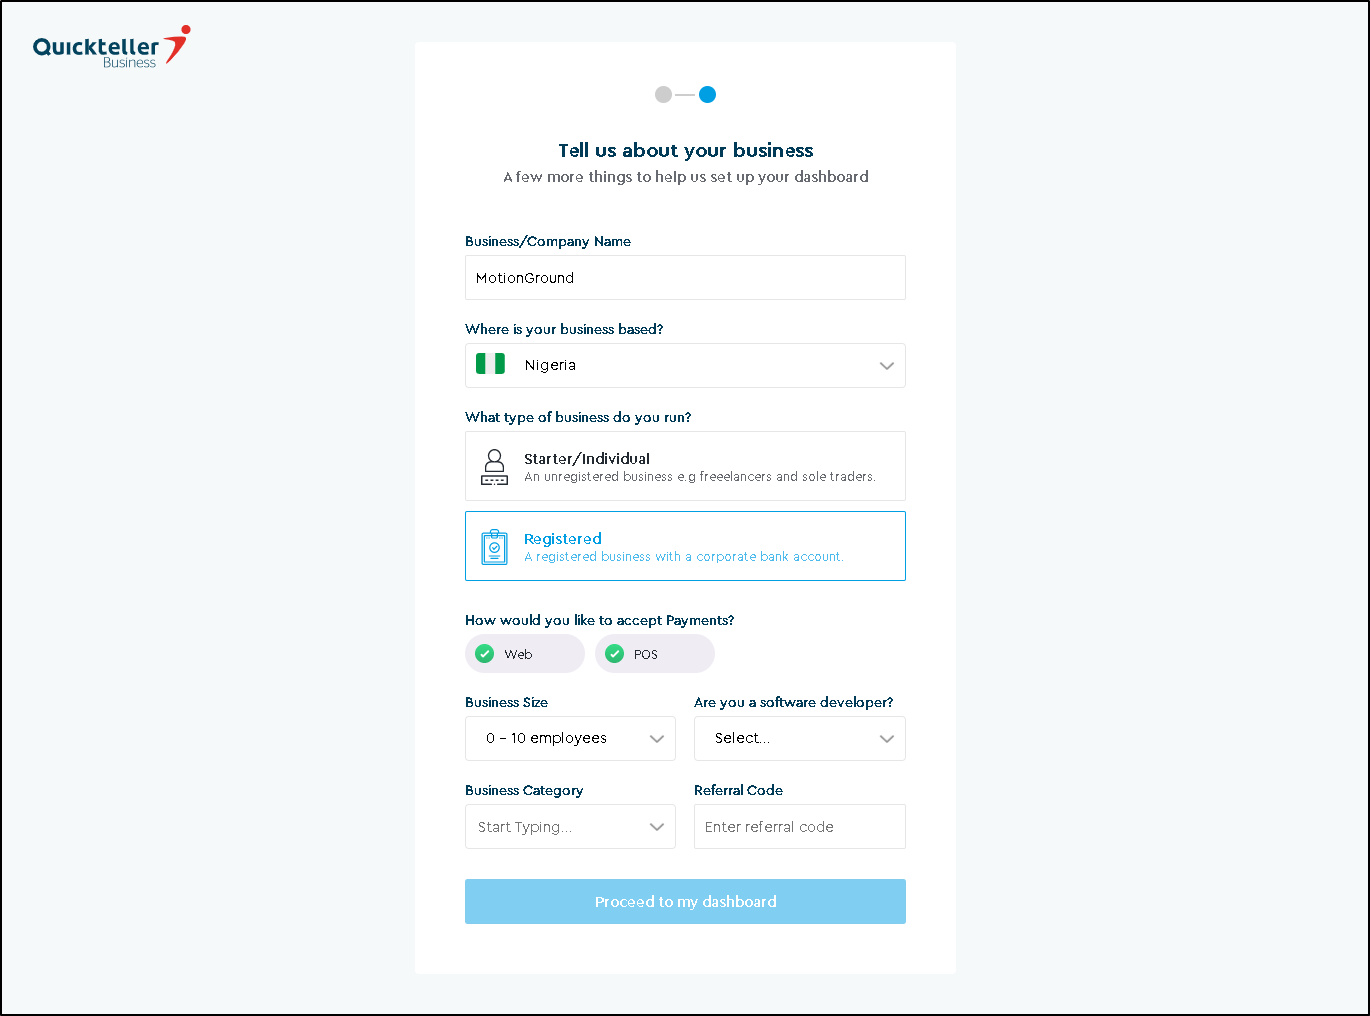
6. Craft your Identity: Provide your company name and choose the type of business, ensuring exact matches with your registration documents if applicable.
7. Location and Scale: Select your business's home country and suggest your approximate employee headcount.
8. Developer Advantage? Inform if you have software developers on your team - they'll get extra access to API tools and documentation.
9. Dashboard Time! Click Proceed to my Dashboard to start exploring the platform and features in test mode.
10. Ready to Launch? Remember, you'll need to provide additional information like contact details, account details, and KYC documents before you can activate live payments.

Think of this as your Quickteller Business foundation. Once you complete these steps, you'll be well on your way to accepting payments and managing your business seamlessly!
KYC (Know Your Customer)
Here’s a summary of the KYC requirements to activate your Quickteller Business account:
Individual Businesses:
- Provide personal details: First name, last name, phone number, and date of birth.
- Verify your identity: BVN (instant verification) and at least one other means of identification (e.g., passport, driver’s license, national ID).
- Settlement limit: 500,000 NGN. To receive payments beyond this limit, you’ll need to upgrade to a registered business account.
Registered Businesses:
- Contact information: First name, last name, and phone number of a primary contact person.
- Business registration: Provide KYC documents and information for verification.
- Business class: Select your business type (e.g., sole proprietorship, limited liability company, etc.).
- Tax identification number: Provide your TIN.
- Document upload: Upload the specific documents required for your business class.
Key Points:
- KYC (Know Your Customer) requirements are essential for Quickteller Business to comply with regulations and ensure secure transactions.
- The specific requirements differ based on whether you’re operating as an individual business or a registered business.
- Completing the KYC process is necessary to activate your account and start receiving payments fully.
Remember, adhering to these KYC requirements helps maintain a safe and compliant environment for everyone.
Go live with Interswitch APIs
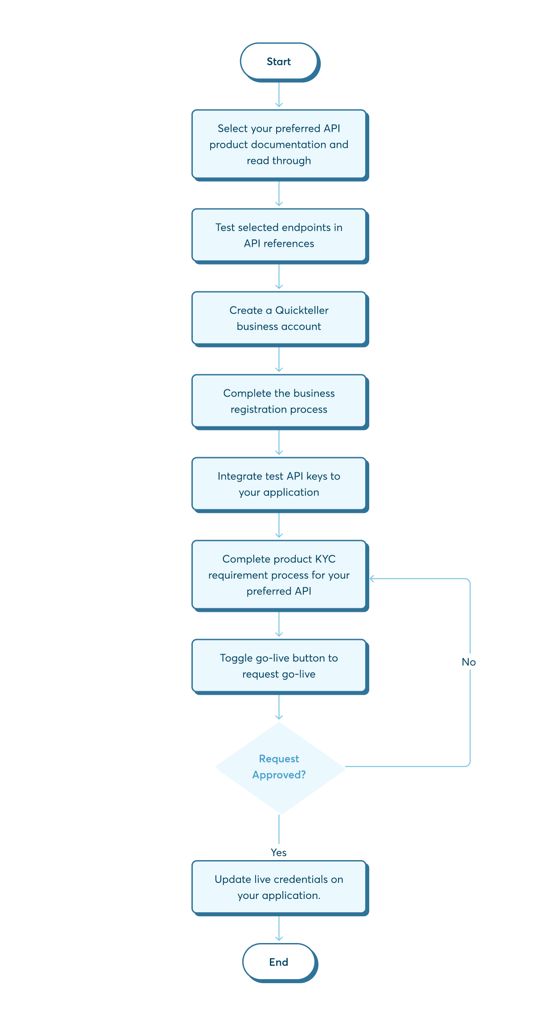
Request Production Access: Once testing is successful and KYC is approved, request access to the production environment to start processing live transactions.
Transition Smoothly: Interswitch will guide you through the launch process to ensure a smooth transition.
A comprehensive overview of the activation process is depicted in the illustration below.
Integrating with NEXTBASKET
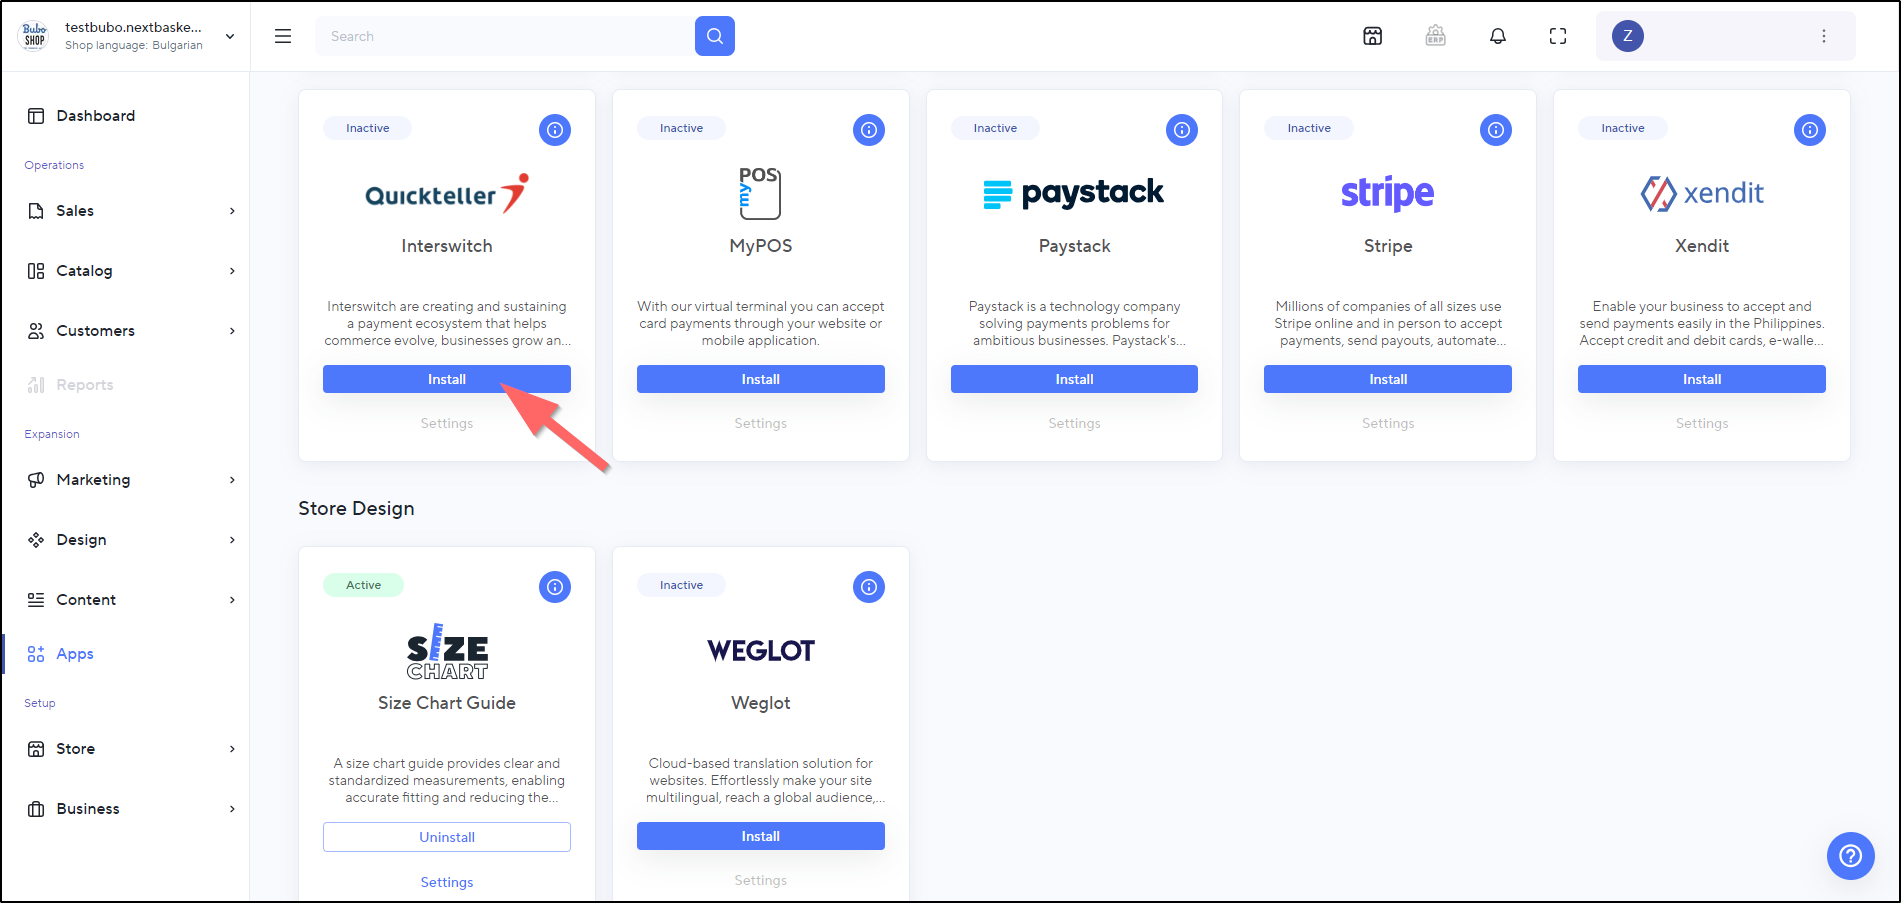
1. In your NEXT BASKET shop’s admin panel, go to the Apps section.
2. Find the Quickteller (Interswitch) app and hit Install.
3. Hit Settings under the app.

4. Enter your merchant code, Pay ID, and secret key.
5. Toggle the status button to Active and confirm the settings using the Save.
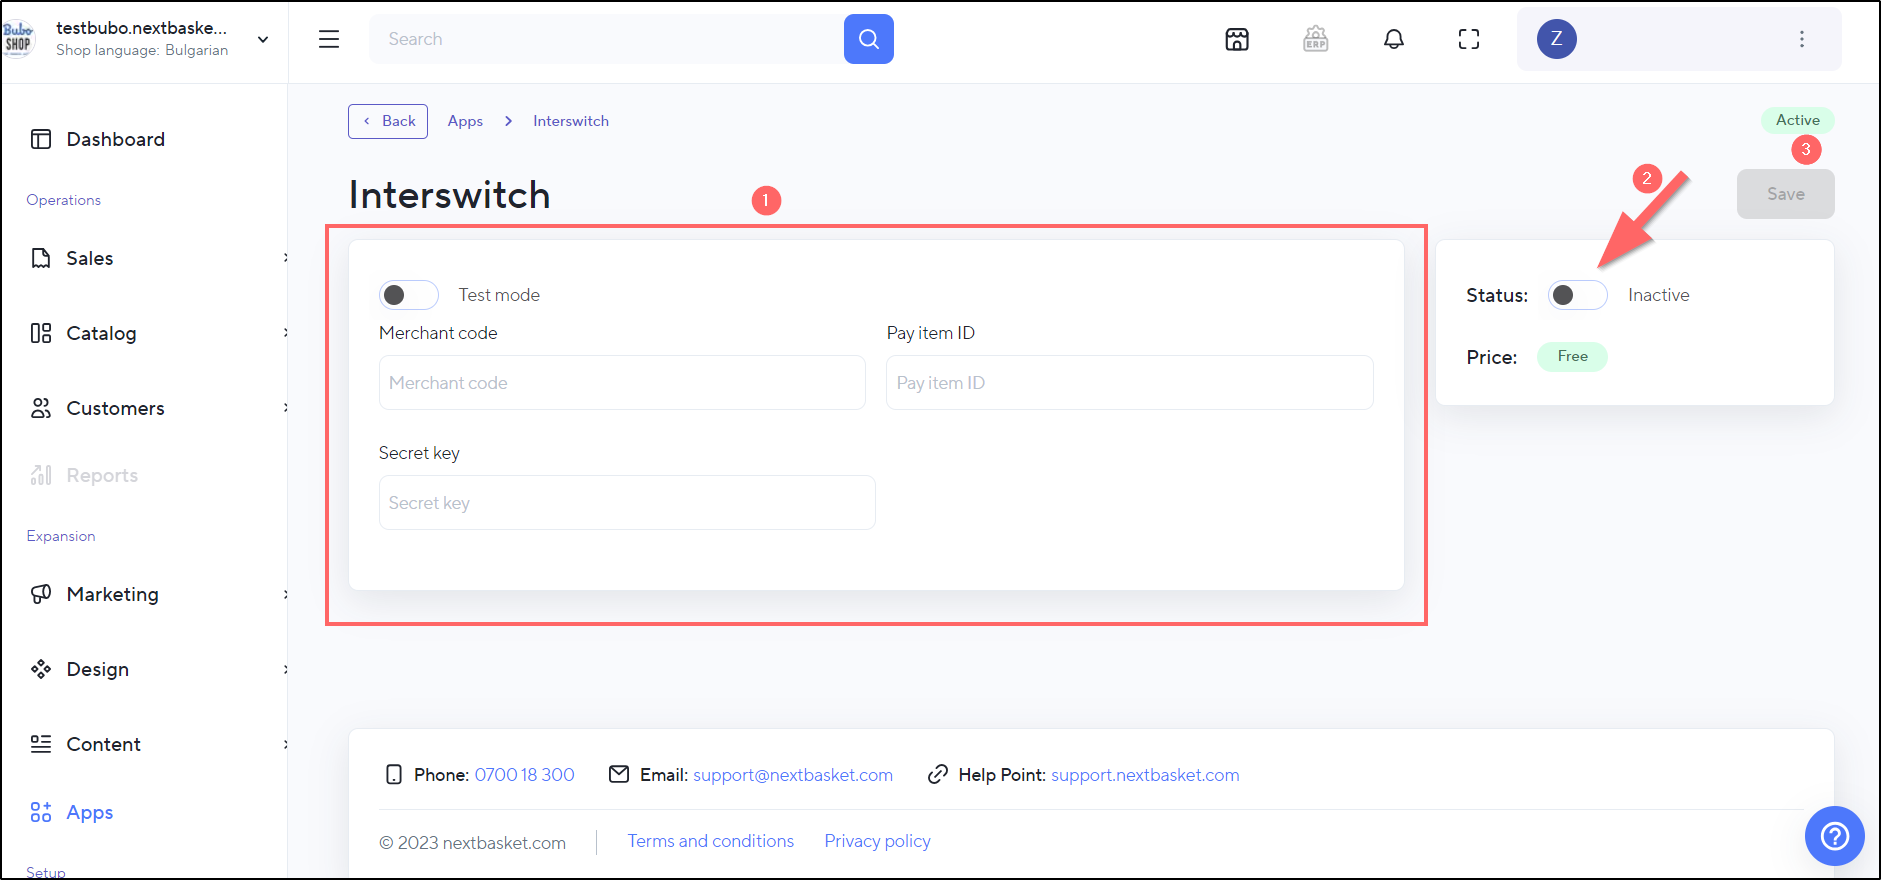
You're all set to accept payments!